Sections of the tutorial will continuously be published at this web page.
This tutorial serves to give you the practical knowledge required to execute the group project in true AGILE fashion.
1. Project Management Tools and Development Toolchain
1.1. Gradle: A Build Framework and Brief Example
This section focuses on writing a Gradle (https://gradle.org/) build script that builds a single Gradle project referred to as Computation. The source code and tests for a Java application is available here: Computation.zip. It is your job to create/reorganize the folder called Computation, move sources and tests into that folder, and produce the Gradle build script build.gradle within this folder to automate the software build and testing process for this example project.
First, open a terminal, and ensure you have the newest version of Gradle (ver. 7.0+) installed with gradle --version.
Follow the steps below and add the snippets listed here to build.gradle, one after the other:
-
Create the following folder structure and a new build.gradle (empty) file within the Computation folder:
Computation
├── build.gradle
└── src
    ├── main
    │   └── java
    │       ├── application
    │       │   └── CompApp.java
    │       ├── computation
    │       │   └── Computation.java
    │       └── view
    │           └── ComputationPage.java
    └── test
        └── java
            └── computation
                ├── AllTests.java
                ├── ComputationTestAddSubstract.java
                └── ComputationTestDivideMultiply.java
For Gradle to build your projects correctly, this is the expected file structure. The
srcfolder is divided up into two subdirectories:\main(all application code goes here) and\test(all tests go here). There MUST be ajavasubfolder within both these subdirectories containing all code. If you do not follow this folder structure, you will need to defineSourceSets. More on this later. -
Add the
javaand theapplicationplugins to the build configuration script build.gradle.apply plugin: 'java' // This plugin has a predefined 'run' task that we can reuse to use Gradle to execute our application apply plugin: 'application'A plugin is simply a set of useful tasks that bundled up that extend our project’s capabilities. There are two types of plugins:
Script additional build script that is declarative in manipulating the build.
Binary Classes that implement the plugin interface and programmatic in manipulating the build.
More information on plugins can be found here.
-
Add JUnit libraries to the
dependenciessection.repositories { mavenCentral() } dependencies { testImplementation "junit:junit:4.12" }Dependencies are external files from other projects that our project relies on to compile, and/or test our source code. Gradle looks for dependencies in repositories. There is no default repository for Gradle so we have to specify one or several.
-
Add and describe a new task
compile(type: JavaCompile)to specify all source files (both application and test) and set the build/bin as destination dir to put all compiled class files in.task compile(type: JavaCompile) { classpath = sourceSets.main.compileClasspath classpath += sourceSets.test.runtimeClasspath sourceSets.test.java.outputDir = file('build/bin') sourceSets.main.java.outputDir = file('build/bin') } task stage () { dependsOn ':Computation:assemble' }Tasks are blocks of work gradle must perform while building our project. Tasks can essentially do anything.
One can specify source sets and their variables the following way: /* * specifying sourceSets is not necessary in this case, since * we are applying the default folder structure assumed by Gradle */ sourceSets { main { java { srcDir 'src/main/java' } } test { java { srcDir 'src/test/java'} } }Although this isn’t necessary, as we follow the default folder structure assumed by Gradle, it is still good practice to do this in case our folder structure changes.
-
Specify the main class and run the application.
mainClassName='application.CompApp'In the command line issue
gradle run -
Describe the
jarGradle task (defined by thejavaplugin) to produce an executable jar file intodistributable/.jar { destinationDir=file('distributable') manifest { // It is smart to reuse the name of the main class variable instead of hardcoding it attributes "Main-Class": "$mainClassName" } } -
Create the
settings.gradlefile and add the following line:include ':Computation'
1.2. GitHub Project Repository
One of the core components of Agile development is being able to manage the development problem space. GitHub projects extends GitHub’s utility to make problem space management easy.
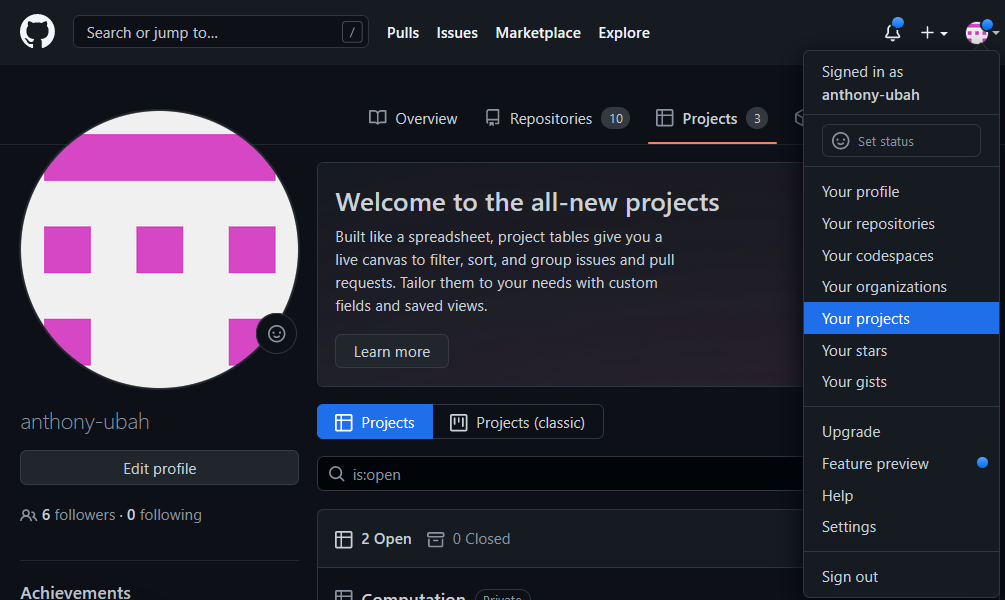
To create a project, click your user icon and select Your projects from the dropdown menu.
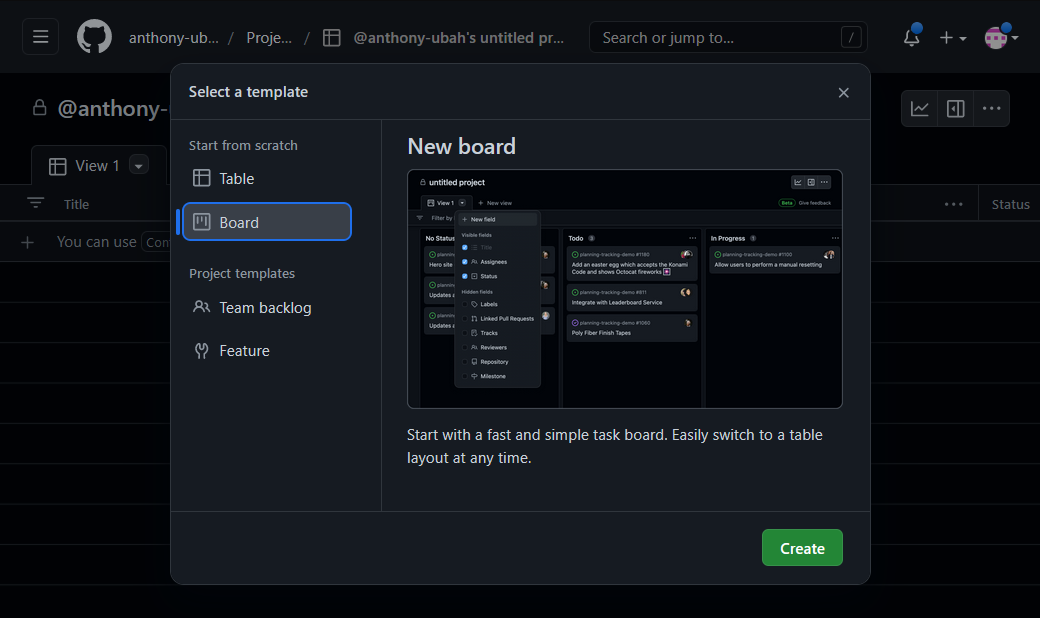
Select the New Project button to create a project. When selecting the template, select Board under the Start from scratch section of the pop-up menu and click Create.
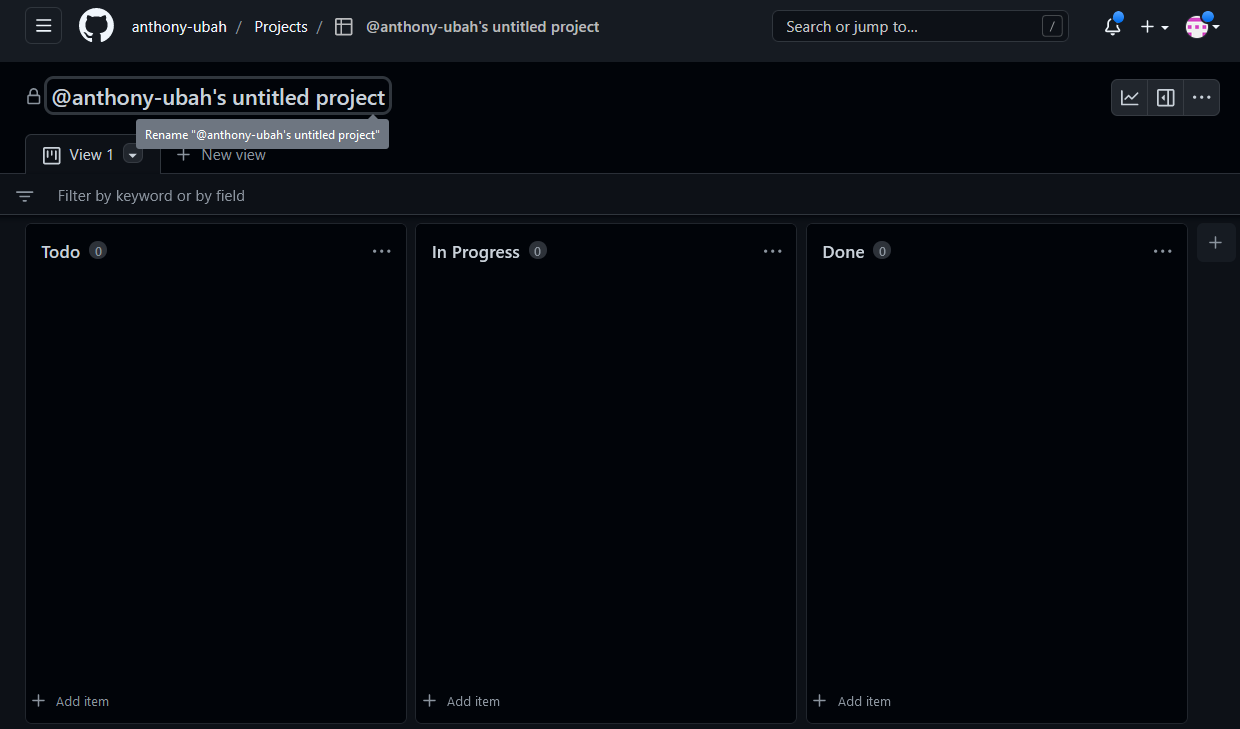
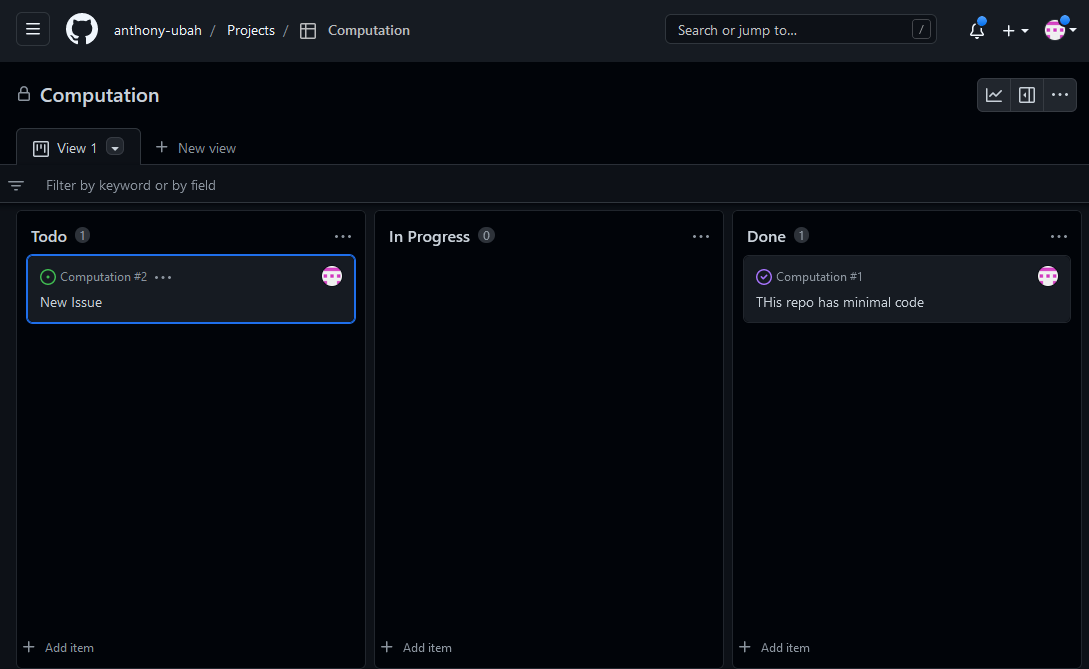
Name your project by selecting the default titular text and replacing it with your own porject’s name. This layout is known as KanBan. By default there are three columns: To do, In progress and Done. More columns can be added by clicking the + button at the far right.
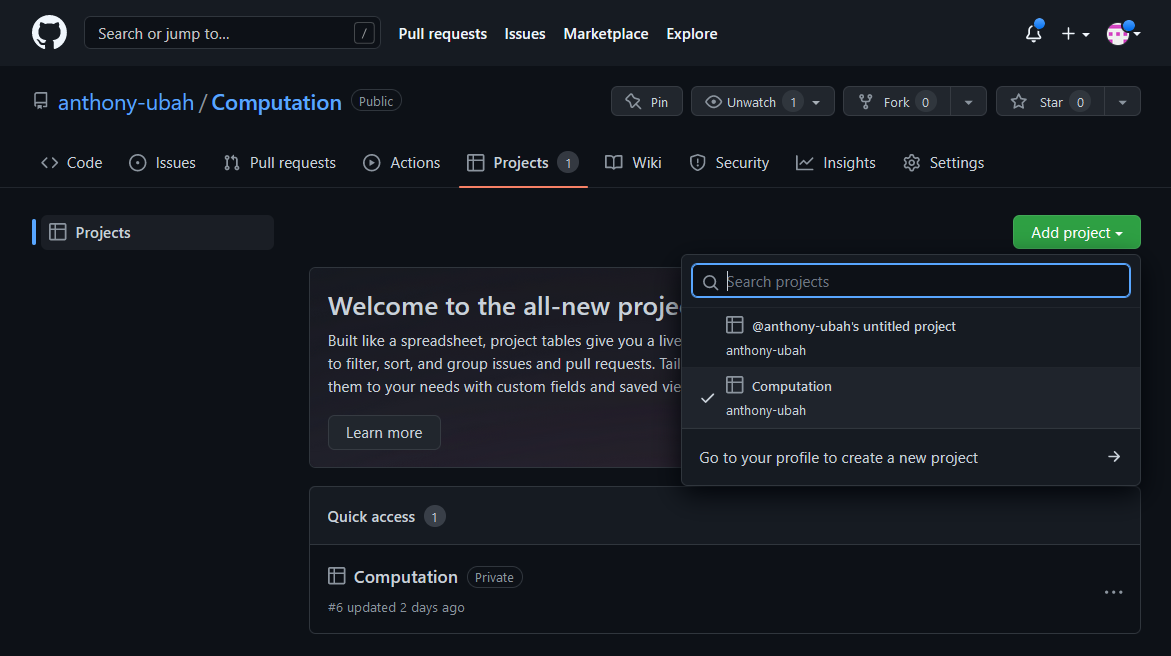
Any repository can be added to a project by navigating to the Projects tab of the repository, selecting the Add project button and choosing the desired project from the dropdown menu. Project KanBan boards can be viewed by clicking the Projects tab of the repository and selecting the appropriate Project.
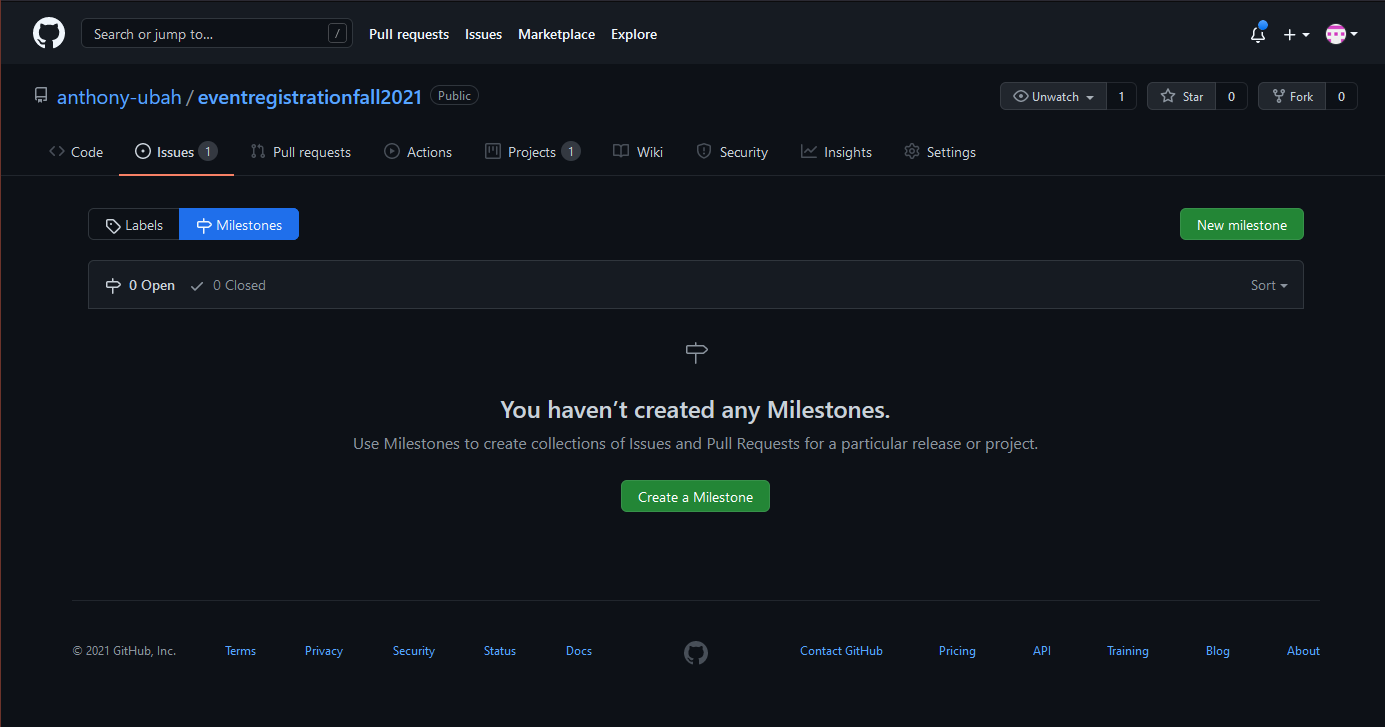
To help with better management of the project as you move through project phases, it is prudent to add Milestones. A new milestone can be created by selecting the Issues tab in the repository, and selecting the Milestones tab located next to the New issue button.
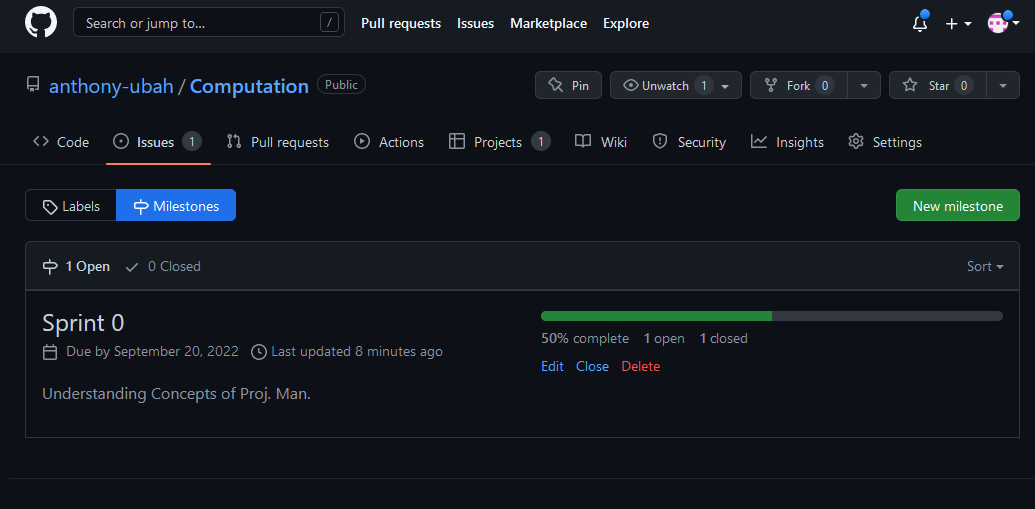
To create a new milestone, select the New Milestone button. Then, fill out the form with an appropriate name, due date and description. Once your milestone has been created, you can attach issues to the milestone and see their progress by selecting the Milestones tab. Name your Milestone appropriately, denote the due date and enter a description.
With Milestones and Projects set up, issues can now be assigned to the appropriate project and Milestones. Their status should be changed so they are automatically triaged under the correct KanBan column that matches. As issues are completed and closed, don’t forget to change their status. Closing issues will fill the progress bar on Milestones, while assigning the status of Done shifts issues on the KanBan board.
| The status of issues can only be changed after they are created. |

When creating a new issue it is imperative to be concise but also as descriptive as possible. All the issues you create should have a title, with a comment to describe the issue in detail.
All issues at the time of creation should be assigned to someone. You can always change this later. Label your issues. If none of the default labels fit, new labels can be created to meet your need. This is accomplished by selecting the Labels tab next to the Milestones tab under the Issues section. Then click the New Label button. Finally, assign your issue to the appropriate milestone and project.
For the purpose of tracking progress through the project, never ever ever delete issues. Issues should be closed and reopened as needed but never deleted. Even if a mistake was made during creation of an issue, issues can be edited by their creator.
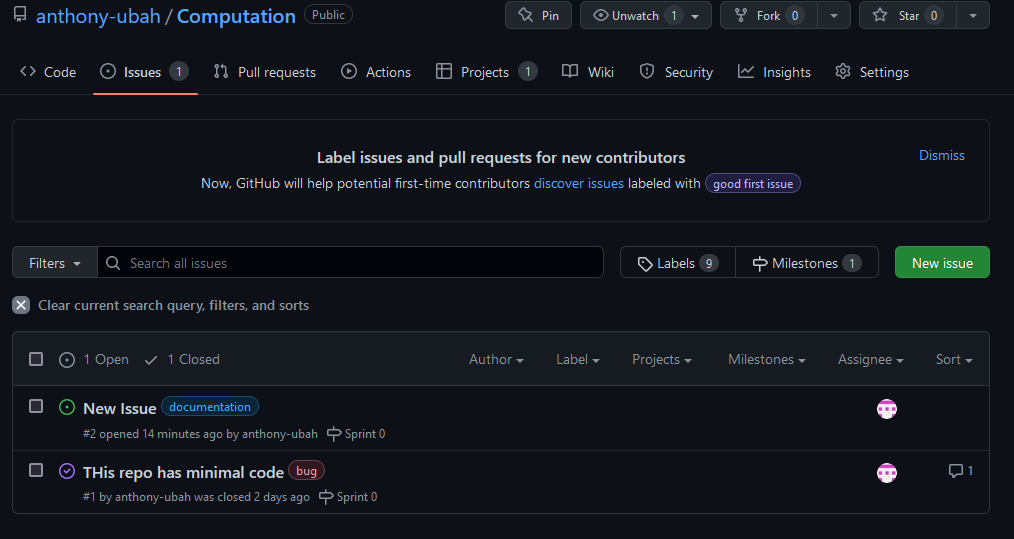
If you’ve set everything up correctly. Your issue board should match your KanBan board. The KanBan board should be a snapshot of how the project is going. Nothing should be done manually here. All the manual labor of opening, moving and triaging issues should be done on the issue board, with automated results appearing on the KanBan board.
1.3. GitHub Actions for Continuous Integration
Conitnuous integration (CI) is at the core of Agile development. The act of writing, testing and integrating incremental amounts of code often serves to detect errors, bugs and integration pain points sooner.
1.3.1. Setup CI Workflow and Template
-
Go to your ronitnuous integration (CI) is at the core of Agile development. The act of writing, testing and integrating incremental amountepository and select Actions in the repository menu tab.
-
Select set up a workflow yourself linked just below the title.

Workflows are automated processes to run one or more jobs. Each .yml file contains a single workflow.
-
Modify the contents of the main.yml to have the following content:
name: Java CI with Gradle

on:
  push:
    branches: master
  pull_request:
    branches: master

jobs:
  build:

    runs-on: Windows-latest

    steps:
    - uses: actions/checkout@v2
    - name: Set up JDK 16
      uses: actions/setup-java@v2
      with:
        java-version: '16'
        distribution: 'adopt'

    - name: Setup Gradle
      uses: gradle/gradle-build-action@v2

    - name: Execute Gradle build
run: ./gradlew build| The configurations in this YML file are used to determine the environment in which to run the specified GitHub action. Though not required, you will want these configurations to mirror the system you’re developing on if you implement build actions for the branches you are solely responsible for to make debugging errors easier. On branches with multiple developers, use configurations that have as much commonality as possible. |
Each part of the .yml is described below. For more detailed coverage of GitHub Actions, visit the documentation page here.
| name |
Name of the workflow or work step as it will appear in the Actions and workflow insight of the GitHub repository. |
| on[event] |
Trigger event that causes execution of workflow. |
| jobs |
Groups all jobs that run in the workflow. |
| runs-on |
Configures job to run on latest version of specified OS. |
| steps |
Groups together steps of parent job. |
| uses |
Specifies what action will run on the particular step |
| run |
Specifies a command to run. |
All that’s left to do is test to make sure it works. Go to local working copy of your repository and initiate a pull, add, commit, status and push command in that order.
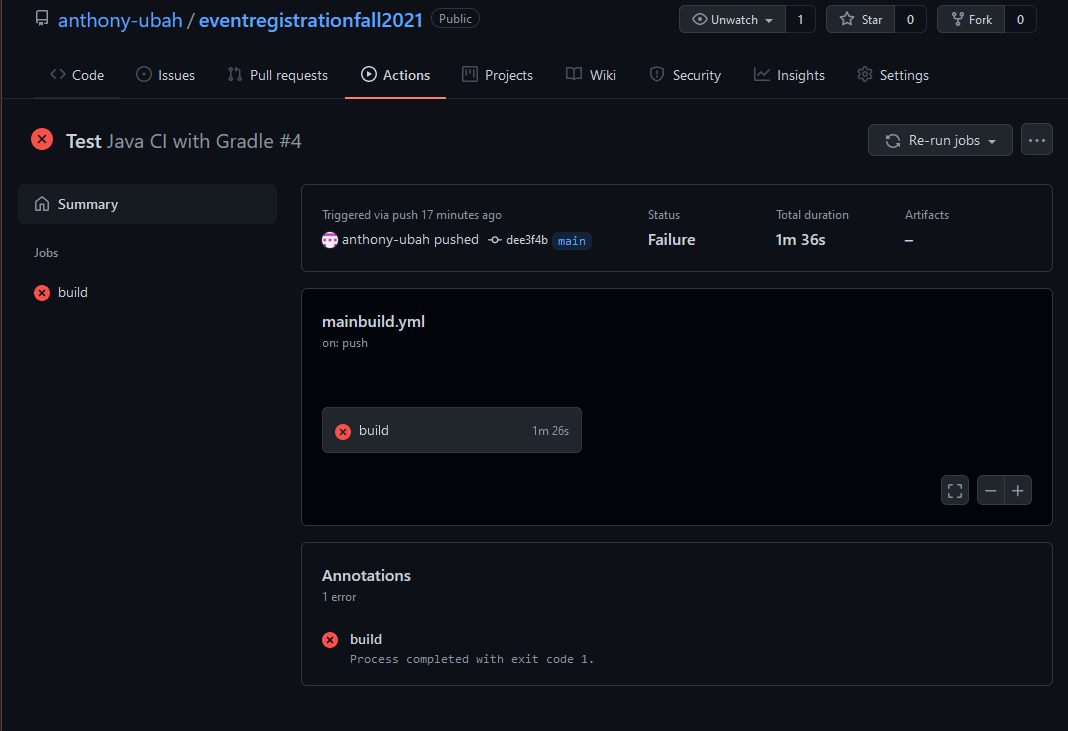
The result of workflow runs can be seen under the Actions tab of the repository.
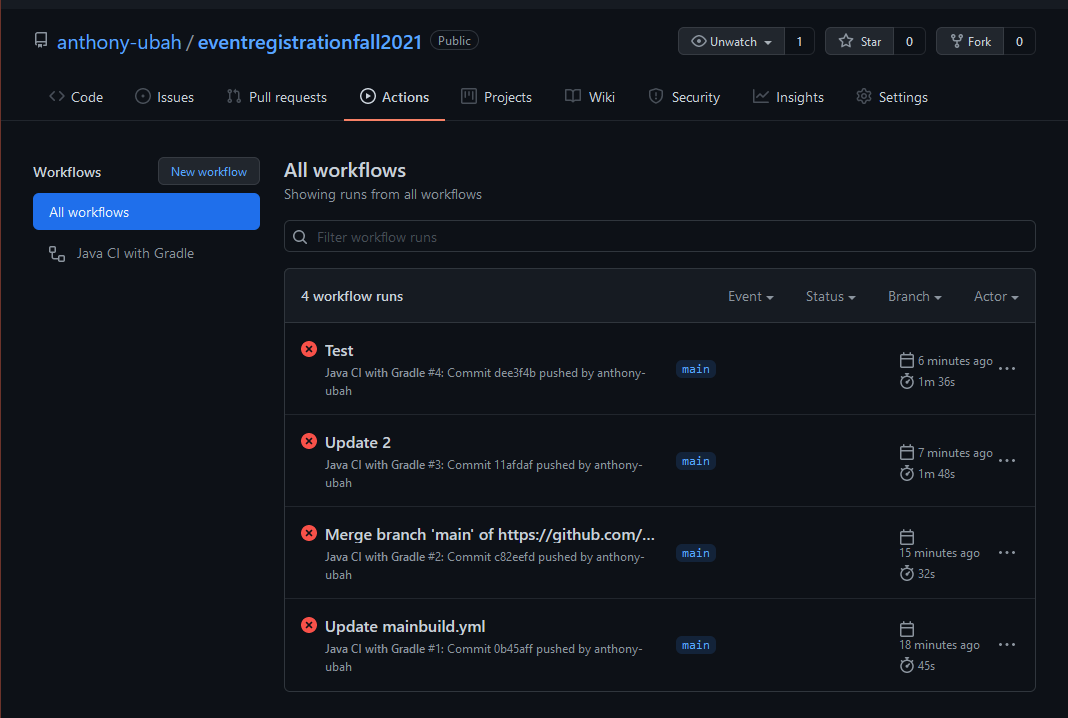
To gain more insight into a workflow run, select the workflow run from the list . Even more insight can be gleaned from independent jobs by selecting them from the list of jjobs as well.
2. Backend
2.1. The Domain Model
Our task is to build an event registration application that allows people to register for events. Before we can program anything we need to model the application.
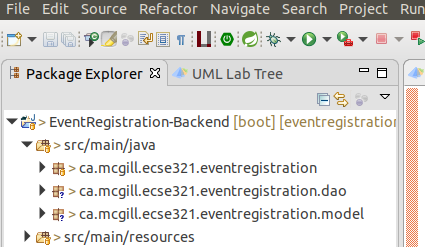
First, create a gradle project following the steps given in Section 1.1. Your project structure should look like this.
EventRegistration-Backend
├── build.gradle
├── settings.gradle
└── src
    ├── main
    │   ├── java
    │   │   └── ca\mcgill\ecse321\eventregistration
    │   │        └── EventRegistrationApplication.java
    │   └── resources
    │       └── application.settings
    │
    └── test
        └── java
            └── ca\mcgill\ecse321\eventregistration
                └── EventRegistrationApplicationTests
For this, use the free modelling program Umple. Full documentation on how to use Umple can be found here.
Ensure that Umple is configured as shown in the image below:
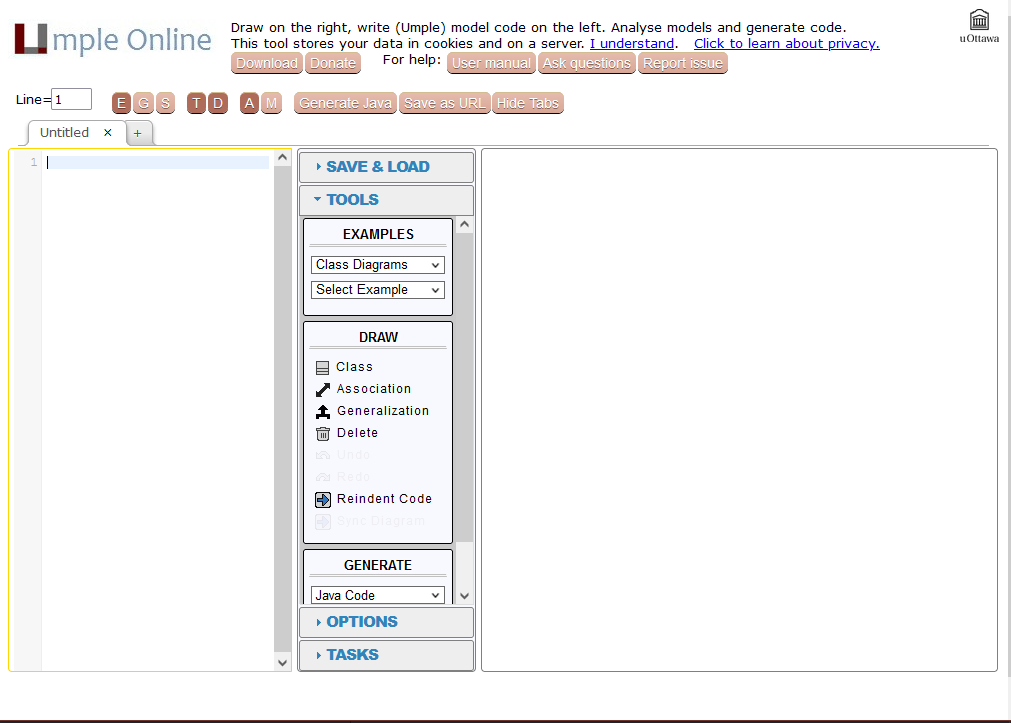
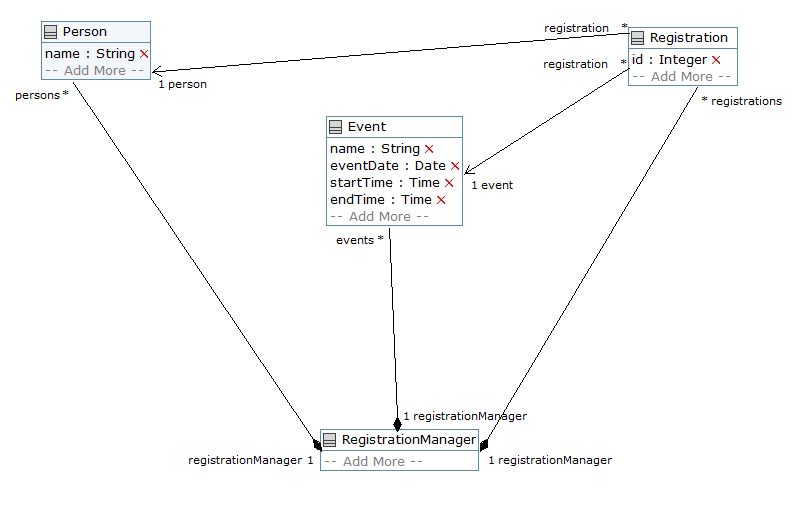
Our task for this tutorial will be to create a simple event registration application that allows people to sign up and register for events.
The final model can be found below and is generated by the following code:
class RegistrationManager
{
}

class Person
{
  name;
}

class Event
{
  name;
  Date eventDate;
  Time startTime;
  Time endTime;
}

class Registration
{
  Integer id;
  }

association {
    1 RegistrationManager registrationManager <@>- 0..* Registration registrations;
}

association {
    1 RegistrationManager registrationManager <@>- 0..* Event events;
}

association {
    1 RegistrationManager registrationManager <@>- 0..* Person persons;
}

association {
   0..* Registration registration ->  1 Event event ;
}


association {
    0..* Registration registration ->  1 Person person;
}
Although the Umple generated Java code can be used, but is too verbose and not JPA compliant. You can see this by comparing the generated Java code to the code found in Model Classes.zip.
This is an exercise in being able to write JPA compliant code simply by looking at the domain model. A brief explanation for relevant JPA tags is here provided:
-
@Entity: Placed before the class declaration to signify an entity.
-
@Id: Placed before the get method for the attribute that will serve as the primary identifier for the class.
-
@OnetoMany or @ManytoOne: Placed before get method for attribute to signify the multiplicity in associative relationship between the current class and reference class. The first word is the multiplicity of the current class, with the other representing the multiplicity of the other calss. The cascade property being set to cascadeType.ALL ensures all operations of the defining class are persisted. The optional property being set to false means the association the tag defines must exist. In this case, the defining class cannot exist without knowledge of the referenced class.
Once your java code has been annotated, create a new folder under src>main>java called model and add the model files into that folder. Each class in our domain model should have its own file. Make sure your model files declare the package:
package ca.mcgill.ecse321.eventregistration.model;Your folder structure should now look like this:
EventRegistration-Backend
├── build.gradle
├── settings.gradle
└── src
    ├── main
    │   ├── java
    │   │   └── ca\mcgill\ecse321\eventregistration
    │   │        ├── EventRegistrationApplication.java
    │   │        └── model
    │   │            ├── Event.java
    │   │            ├── Person.java
    │   │            ├── Registration.java
    │   │            └── RegistrationManager.java
    │   └── resources
    │       └── application.settings
    │
    └── test
        └── java
            └── ca\mcgill\ecse321\eventregistration
                └── EventRegistrationApplicationTests
2.2. Database Communication With and Without Spring Framework
In this section we will see how to communications with the database are programmed. Don’t worry about setting up the Spring Framework or the database server for the time being. The goal is to illustrate the concept.
2.2.1. CRUD Transactions Without Spring
-
Verify the contents of the
EventRegistrationBackendApplicationclass:package ca.mcgill.ecse321.eventregistration; import org.springframework.boot.autoconfigure.SpringBootApplication; import org.springframework.boot.SpringApplication; import org.springframework.web.bind.annotation.RestController; import org.springframework.web.bind.annotation.RequestMapping; @RestController @SpringBootApplication public class EventRegistrationBackendApplication { public static void main(String[] args) { SpringApplication.run(EventRegistrationApplication.class, args); } @RequestMapping("/") public String greeting() { return "Hello world!"; } } -
Create a new package in
src/main/javaand name itca.mcgill.ecse321.eventregistration.dao. -
Create the
EventRegistrationRepositoryclass within this new packagepackage ca.mcgill.ecse321.eventregistration.dao; import java.sql.Date; import java.sql.Time; import java.util.List; import javax.persistence.EntityManager; import javax.persistence.TypedQuery; import org.springframework.beans.factory.annotation.Autowired; import org.springframework.stereotype.Repository; import org.springframework.transaction.annotation.Transactional; import ca.mcgill.ecse321.eventregistration.model.Person; import ca.mcgill.ecse321.eventregistration.model.Event; @Repository public class EventRegistrationRepository { @Autowired EntityManager entityManager; @Transactional public Person createPerson(String name) { Person p = new Person(); p.setName(name); entityManager.persist(p); return p; } @Transactional public Person getPerson(String name) { Person p = entityManager.find(Person.class, name); return p; } @Transactional public Event createEvent(String name, Date date, Time startTime, Time endTime) { Event e = new Event(); e.setName(name); e.setDate(date); e.setStartTime(startTime); e.setEndTime(endTime); entityManager.persist(e); return e; } @Transactional public Event getEvent(String name) { Event e = entityManager.find(Event.class, name); return e; } } -
Add a new method that gets all events before a specified date (
deadline). Use a typed query created from an SQL command:@Transactional public List<Event> getEventsBeforeADeadline(Date deadline) { TypedQuery<Event> q = entityManager.createQuery("select e from Event e where e.date < :deadline",Event.class); q.setParameter("deadline", deadline); List<Event> resultList = q.getResultList(); return resultList; }
To try the methods, you can create a JUnit test under src/test/java. Currently the methods in EventRegistrationRepository directly access the objects stored in the database via the EntityManager instance and these methods should implement both database operations and service business logic (including input validation — which we omitted in this part). In later sections, however, we will see how we can easily separate the database access and the service business logic in Spring applications.
|
2.3. Setting Up a Local PostgreSQL Database
In this section, we will set up a local PostgreSQL database to store our application’s data.
2.3.1. Installation
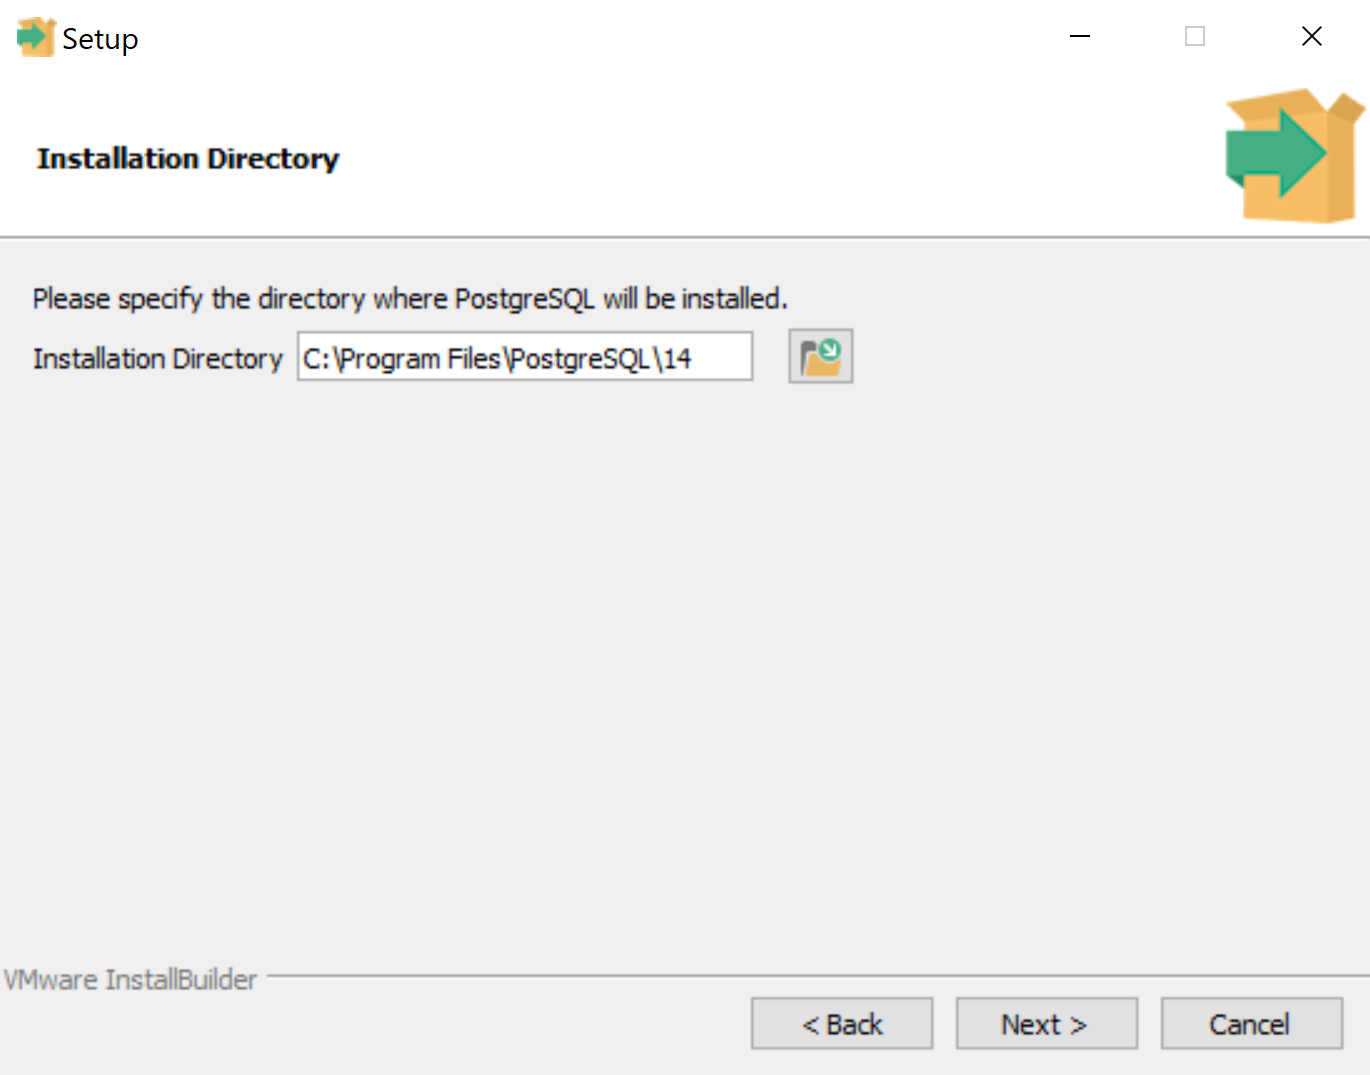
Download PostgreSQL 14.5 from https://www.enterprisedb.com/downloads/postgres-postgresql-downloads. Once the download is complete, run the installer. You can stick with the default values for most screens.
The default installation directory should be fine.
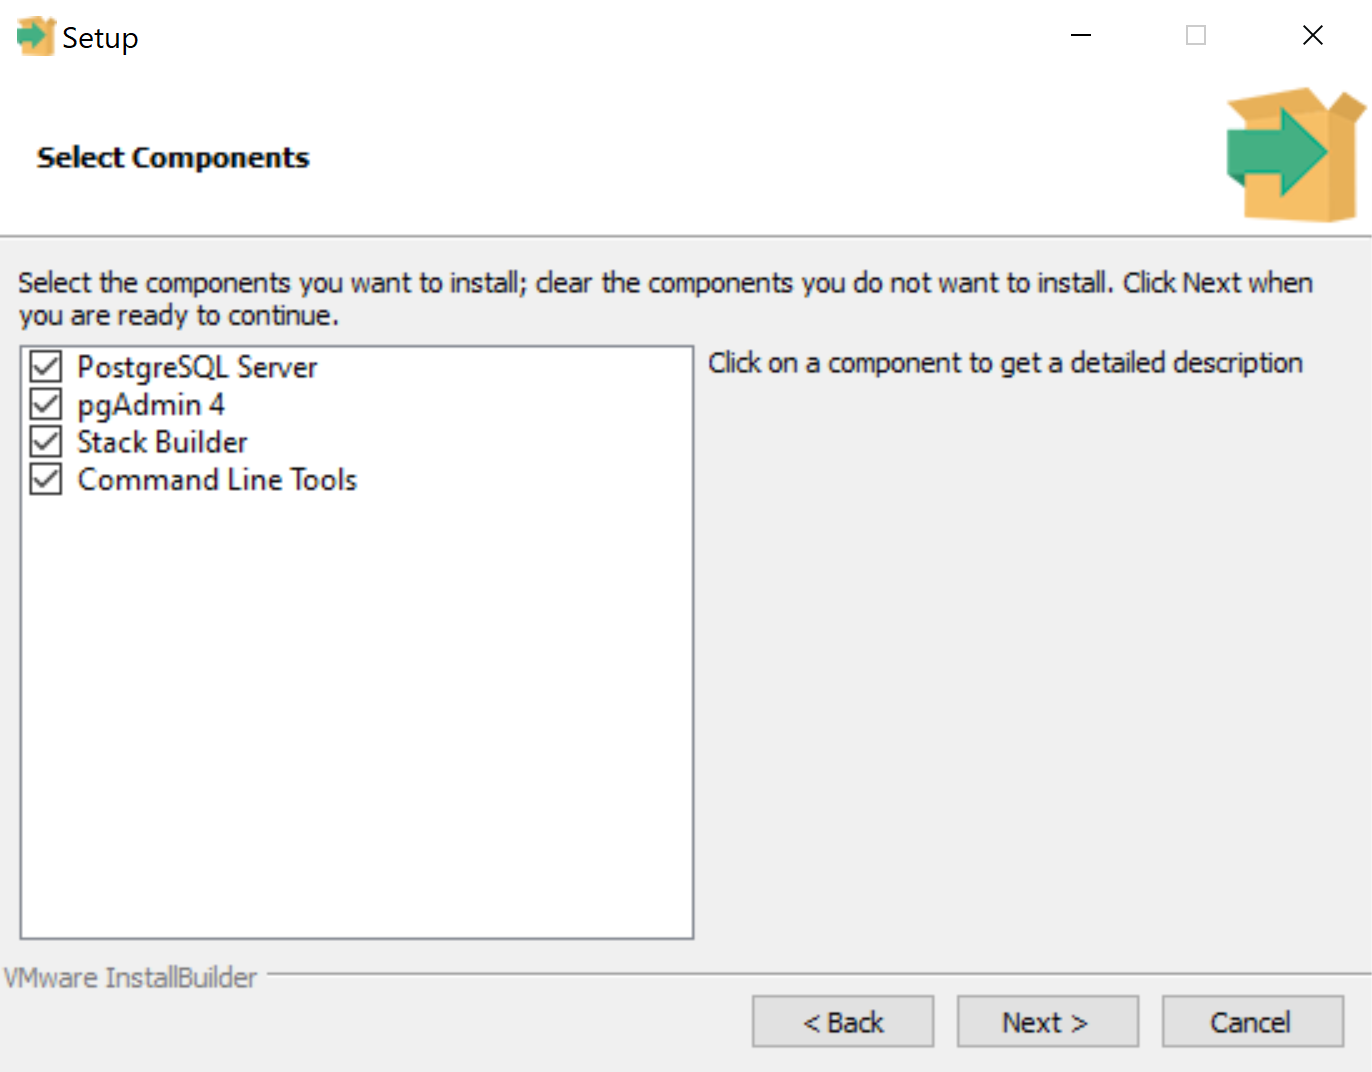
Leave every component checked.
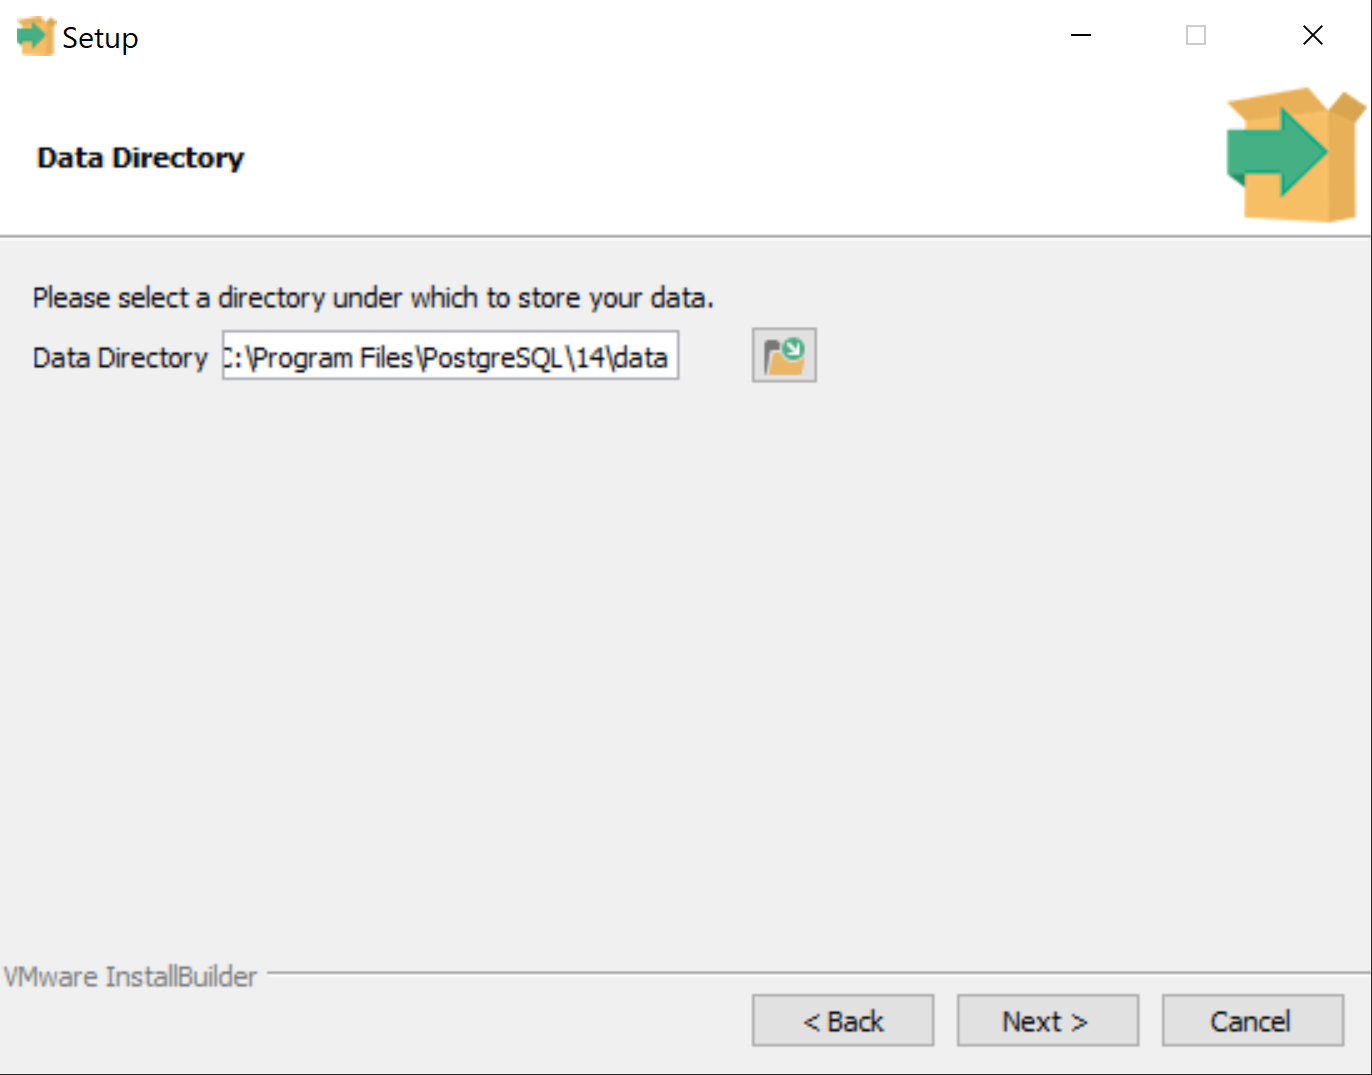
The default data directory should be fine.
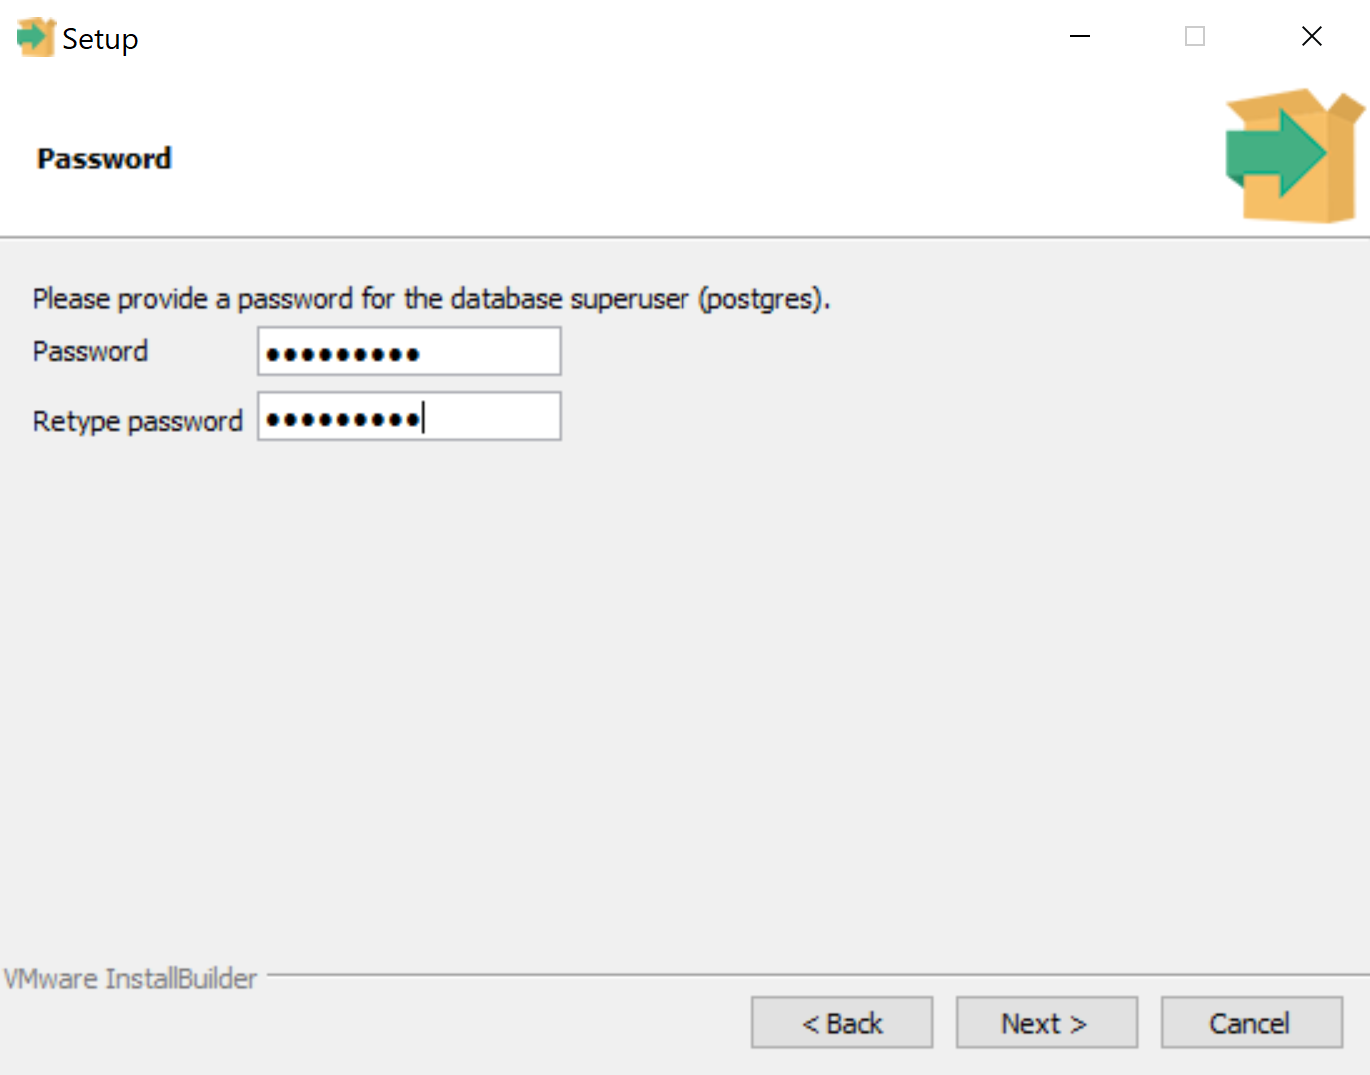
Choose a password. IMPORTANT: do not forget this password. You will need it later.
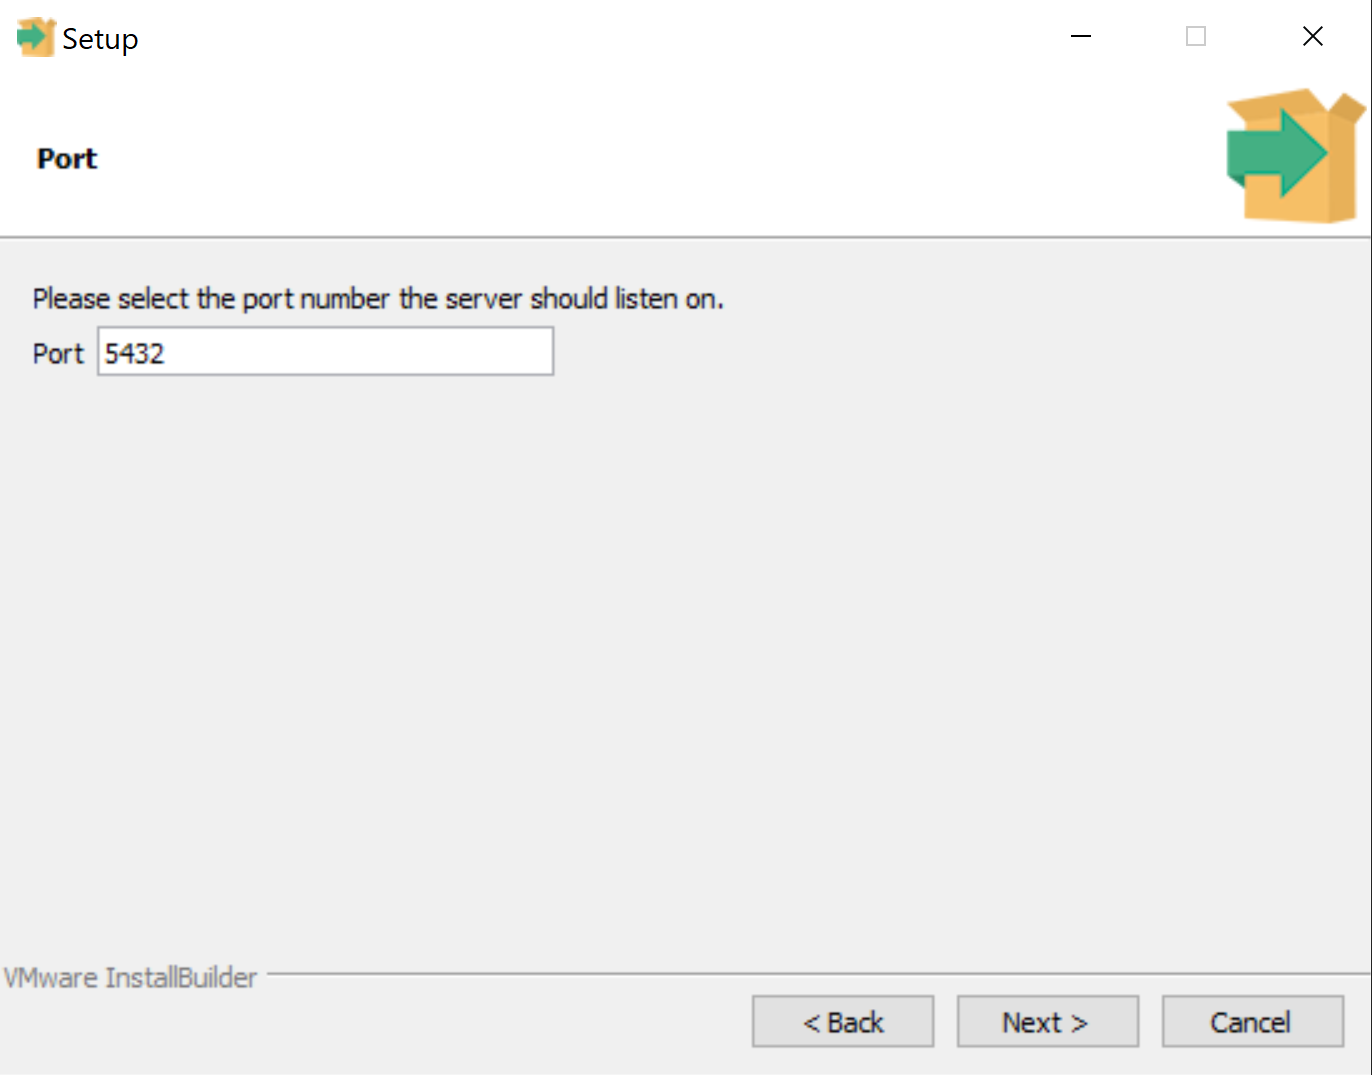
The default port number should be fine. However, there’s no problem using a different port number in case a different app is using 5432 for some reason. Just remember your choice so that you know which port your app should connect to.
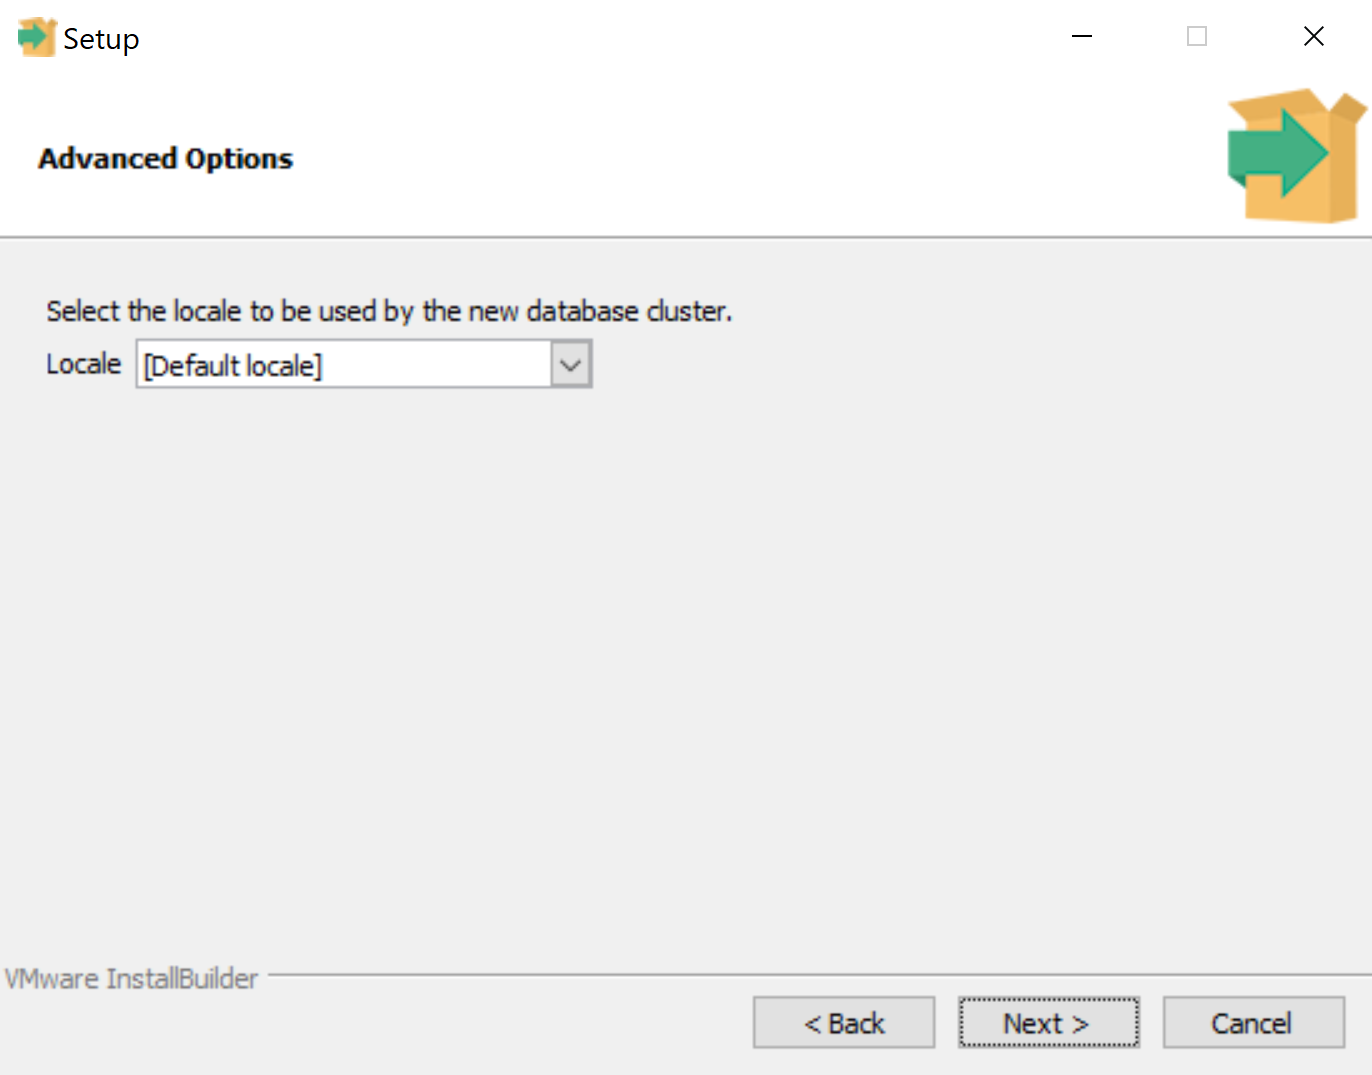
The default locale should be fine.
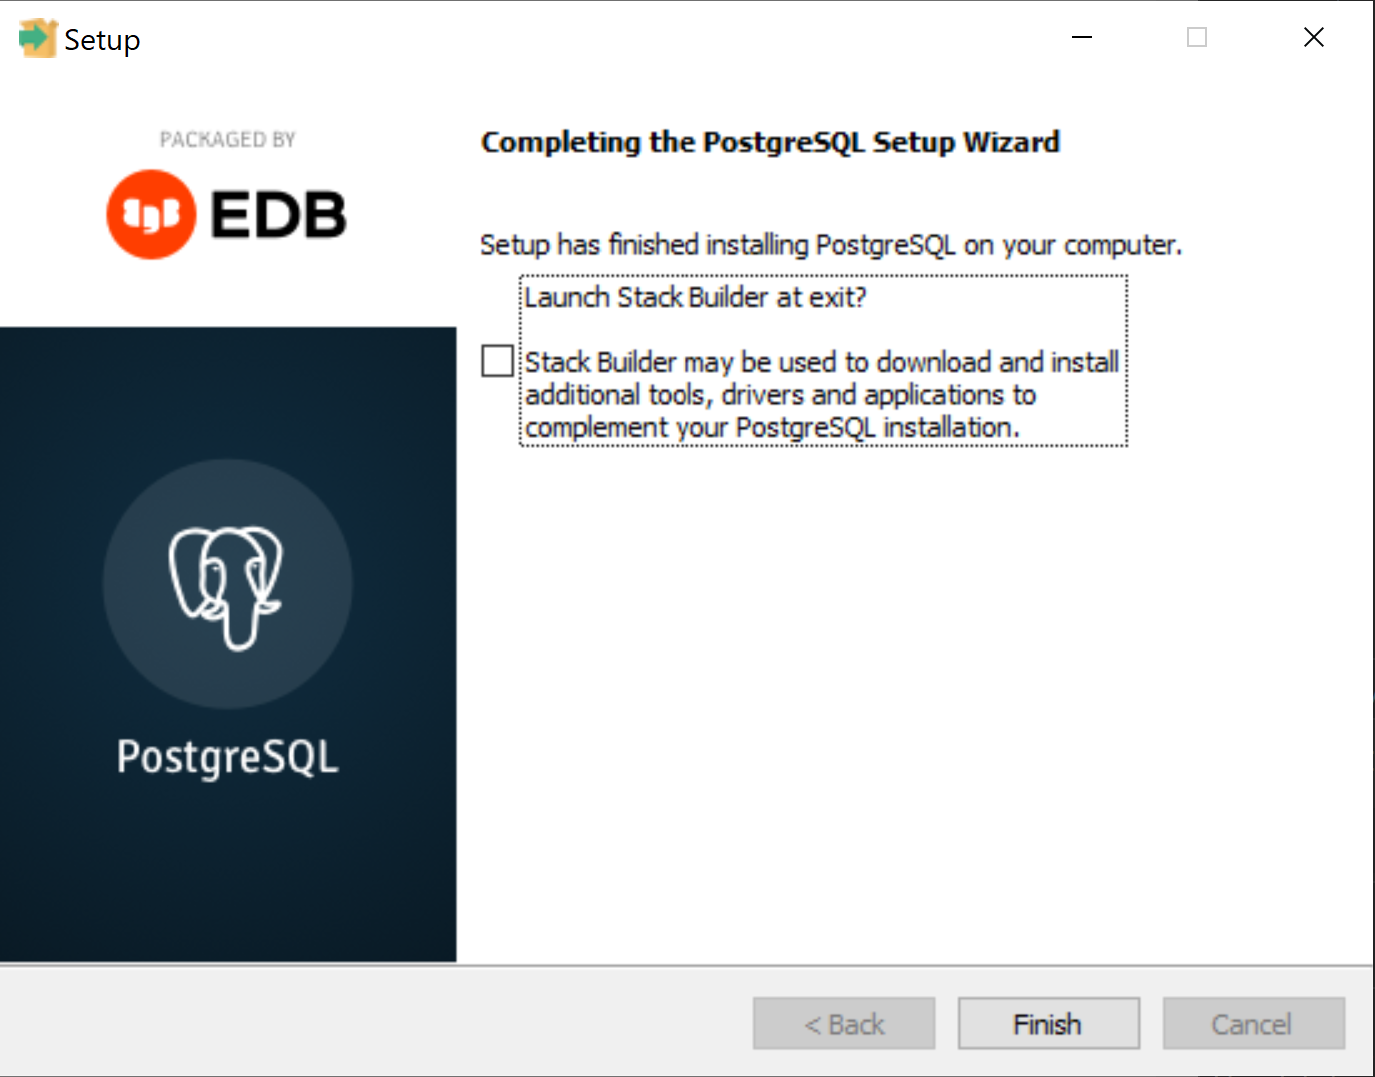
The summary might look something like this:

There’s no need for other tools, so you can skip the Stack Builder after the installation by unchecking the checkbox.
2.3.2. Creating a Database
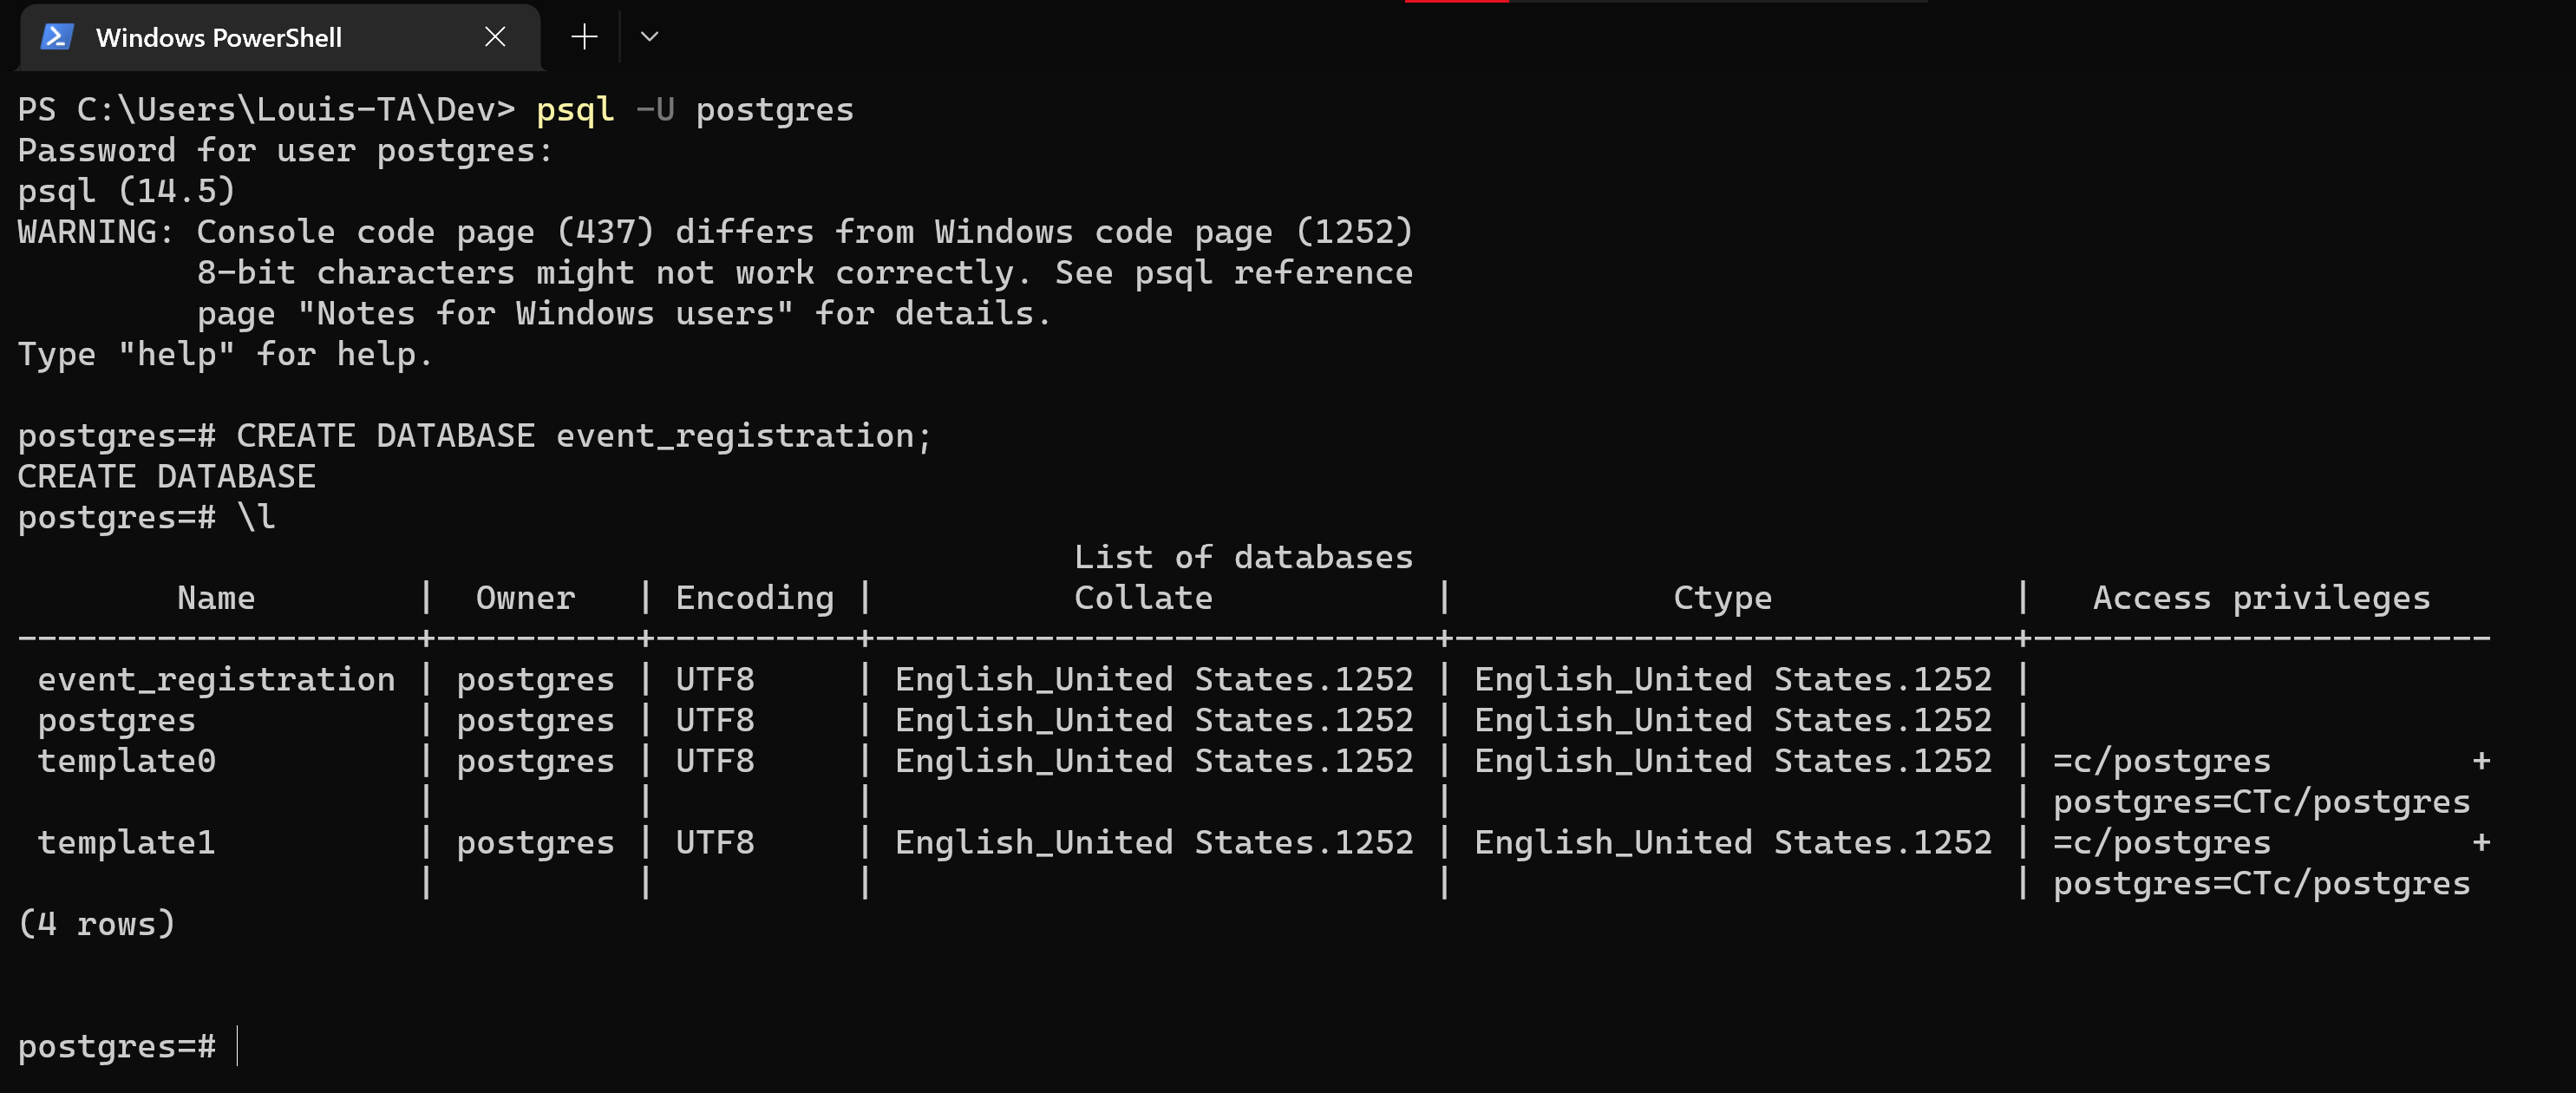
Once PostgreSQL is installed, you should be able to connect to your local instance by running the command psql -U postgres and entering your password (I hope you haven’t forgotten it already).
A server can host multiple databases. Create a new database for the event registration app using the command
CREATE DATABASE event_registration;Check that the database exists by running the command \l:
2.4. Setting up a Spring Boot Project
In this section, we will use Spring Initializr to quickly generate the folder structure and some files for a new Spring Boot project.
-
Go to https://start.spring.io/.
-
Set the project type to Gradle.
-
Leave the Spring Boot version at the default value (2.7.5).
-
Set the names for the group, package, etc.
-
Set the Java version (17 should be fine).
-
Add the following dependencies:
-
web
-
data-jpa
-
postgresql
-

Click "GENERATE" and you should get a zip file with the following files and folders.
.
├── HELP.md
├── build.gradle
├── gradle
│   └── wrapper
│       ├── gradle-wrapper.jar
│       └── gradle-wrapper.properties
├── gradlew
├── gradlew.bat
├── settings.gradle
└── src
    ├── main
    │   ├── java
    │   │   └── ca
    │   │       └── mcgill
    │   │           └── ecse321
    │   │               └── eventregistration
    │   │                   └── EventRegistrationApplication.java
    │   └── resources
    │       ├── application.properties
    │       ├── static
    │       └── templates
    └── test
        └── java
            └── ca
                └── mcgill
                    └── ecse321
                        └── eventregistration
                            └── EventRegistrationApplicationTests.java
Open application.properties and write the following:
server.port = ${PORT:8080}

spring.datasource.driver-class-name=org.postgresql.Driver
spring.jpa.hibernate.ddl-auto=update

spring.datasource.url=jdbc:postgresql://localhost:5432/event_registration
spring.datasource.username=postgres
spring.datasource.password=PASSWORD(PASSWORD is the password you chose while setting up the local database.)
2.5. CRUD Repositories
Previously, in the ca.mcgill.ecse321.eventregistration.dao.EventRegistrationRepository class we used an instance of javax.persistence.EntityManager from Hibernate to directly implement the required operations related to saving/retrieving data to/from a database (Create, Read, Update, and Delete operations, shortly, CRUD).
This section will introduce the Spring framework’s inbuilt support for such CRUD operations via the org.springframework.data.repository.CrudRepository interface and will show how to use such repositories to implement your use cases in so-called service classes.
If you would like to, you can obtain a version of the project that already has the code for the backend and model classes from the previous tutorials here.
2.5.1. Creating a CRUD Repository
-
Create a new interface
PersonRepositoryin theca.mcgill.ecse321.eventregistration.daopackage and extend theCrudRepository<Person, String>interface -
Create a new method
Person findByName(String name)package ca.mcgill.ecse321.eventregistration.dao; import org.springframework.data.repository.CrudRepository; import ca.mcgill.ecse321.eventregistration.model.Person; public interface PersonRepository extends CrudRepository<Person, String>{ Person findPersonByName(String name); } -
Since Spring supports automated JPA Query creation from method names (see possible language constructs here) we don’t need to implement the interface manually, Spring JPA will create the corresponding queries runtime! This way we don’t need to write SQL queries either.
-
Create interfaces for the
EventandRegistrationclasses as well
EventRepository.java:package ca.mcgill.ecse321.eventregistration.dao; import org.springframework.data.repository.CrudRepository; import ca.mcgill.ecse321.eventregistration.model.Event; public interface EventRepository extends CrudRepository<Event, String> { Event findEventByName(String name); }RegistrationRepository.java:
package ca.mcgill.ecse321.eventregistration.dao; import java.util.List; import org.springframework.data.repository.CrudRepository; import ca.mcgill.ecse321.eventregistration.model.Event; import ca.mcgill.ecse321.eventregistration.model.Person; import ca.mcgill.ecse321.eventregistration.model.Registration; public interface RegistrationRepository extends CrudRepository<Registration, Integer> { List<Registration> findByPerson(Person personName); boolean existsByPersonAndEvent(Person person, Event eventName); Registration findByPersonAndEvent(Person person, Event eventName); } -
Finally, create a new package in
src/main/javaand name itca.mcgill.ecse321.eventregistration.model. Place all the model classes generated in the Step 2.4. By now, all the errors in all other packages should be resolved automatically. In the end, you should have the given below structure in terms of packages.
2.6. Testing the Persistence Layer
Now we will write some tests to verify that our persistence layer is working as expected.
2.6.1. Writing a Test
The basic structure of a repository layer test is:
-
Create a new object.
-
Save the object to the database using the repository.
-
Read the object from the database using the repository.
-
Assert that the object from the database has the correct attributes.
Use dependency injection (via the @Autowired annotation) to get an instance of your repository. Also add the @Test annotation to each test method.
You also want to clear the database after each run so that you don’t waste storage space and so that you avoid violating any unique constraints. Define a method clearDatabase() with the annotation @AfterEach that clears all relevant tables.
The test class for the PersonRepository should be similar to the following code. The package and import statements have been omited for clarity.
@SpringBootTest
public class PersonRepositoryTests {
	@Autowired
	private PersonRepository personRepository;

	@AfterEach
	public void clearDatabase() {
		personRepository.deleteAll();
	}

	@Test
	public void testPersistAndLoadPerson() {
		// Create object
		String name = "Anakin Skywalker";
		Person anakin = new Person();
		anakin.setName(name);

		// Save object
		anakin = personRepository.save(anakin);
		int id = anakin.getId();

		// Read object from database
		anakin = personRepository.findPersonById(id);

		// Assert that object has correct attributes
		assertNotNull(anakin);
		assertEquals(name, anakin.getName());
	}
}
The test class for the RegistrationRepository should look something like this:
@SpringBootTest
public class RegistrationRepositoryTests {
	@Autowired
	private PersonRepository personRepository;
	@Autowired
	private EventRepository eventRepository;
	@Autowired
	private RegistrationRepository registrationRepository;

	@AfterEach
	public void clearDatabase() {
		// Delete the registrations first to avoid violating not-null constraint
		registrationRepository.deleteAll();

		personRepository.deleteAll();
		eventRepository.deleteAll();
	}

	@Test
	public void testPersistAndLoadRegistration() {
		String eventName = "Order 66";
		Date date = Date.valueOf("2022-09-06");
		Time startTime = Time.valueOf("16:00:00");
		Time endTime = Time.valueOf("17:00:00");
		Event event = new Event();
		event.setName(eventName);
		event.setEventDate(date);
		event.setStartTime(startTime);
		event.setEndTime(endTime);
		// You need to manually save this before saving the registration: Hibernate doesn't seem to do it for you
		eventRepository.save(event);

		String participantName = "Anakin Skywalker";
		Person participant = new Person();
		participant.setName(participantName);
		participant = personRepository.save(participant);
		int participantId = participant.getId();

		Registration registration = new Registration();
		registration.setEvent(event);
		registration.setParticipant(participant);

		registration = registrationRepository.save(registration);
		int registrationId = registration.getId();

		registration = null;
		event = null;
		participant = null;

		registration = registrationRepository.findRegistrationById(registrationId);

		assertNotNull(registration);
		assertEquals(registrationId, registration.getId());

		assertNotNull(registration.getEvent());
		assertEquals(eventName, registration.getEvent().getName());

		assertNotNull(registration.getParticipant());
		assertEquals(participantId, registration.getParticipant().getId());
	}
}
Creating a class to test the persistence of Event objects is left as an exercise. It is similar to the test class for Person objects.
2.6.2. Running the Tests
To run the tests, cd into the EventRegistration-Backend folder and issue the command ./gradlew test.
2.6.3. Debugging Failing Tests
You will almost certainly encounter failing tests at some point. When this happens, it is usually helpful to read the stack trace and see if there are any helpful hints. At first you will probably find that the stack traces are short and not very informative. Add the following snippet inside the test task in your build.gradle file:
testLogging {
	exceptionFormat "full"
}
Re-run the tests and you should see much longer stack traces with helpful hints. Focus on the "Caused by:" parts.
If all the tests are failing (including contextLoads()), it means your project failed to start. This is generally because it failed to connect to the database or there is an issue with your model.
Common Errors
-
Missing or badly-formatted data in
application.properties. You need a database driver, the URL of an existing database, a username, and a password. The database URL is particularly easy to mess up: it needs to follow the formatjdbc:postgresql://localhost:port/database_name. -
Using reserved keywords for class names (e.g.,
User). This will result in a nasty SQL syntax error. -
Incorrectly named repository methods. For example, if you have a property
eventNameand you call your repository methodfindEventByName(), Spring will complain that there’s no property callednamein theEventclass. -
Missing annotations. For example, if you forget an
@Idannotation, Spring will complain that there’s no unique identifier for your class.
2.7. Creating RESTful Web Services in Spring
The following steps provide guidance on (1) implementing business logic that implements the required functionality (classes annotated with @Service) and (2) exposing them using a REST API in the context of the Event Registration Application (classes annotated with @RestController).
2.7.1. Implementing Service Methods
We implement use-cases in service classes by using the DAOs for each data type of the domain model.
-
In src/main/java, create a new package
ca.mcgill.ecse321.eventregistration.service. -
In this package, create the
EventRegistrationServiceclass as shown belowpackage ca.mcgill.ecse321.eventregistration.service; import java.sql.Date; import java.sql.Time; import java.util.ArrayList; import java.util.List; import org.springframework.beans.factory.annotation.Autowired; import org.springframework.stereotype.Service; import org.springframework.transaction.annotation.Transactional; import ca.mcgill.ecse321.eventregistration.dao.EventRepository; import ca.mcgill.ecse321.eventregistration.dao.PersonRepository; import ca.mcgill.ecse321.eventregistration.dao.RegistrationRepository; import ca.mcgill.ecse321.eventregistration.model.Event; import ca.mcgill.ecse321.eventregistration.model.Person; import ca.mcgill.ecse321.eventregistration.model.Registration; @Service public class EventRegistrationService { @Autowired EventRepository eventRepository; @Autowired PersonRepository personRepository; @Autowired RegistrationRepository registrationRepository; @Transactional public Person createPerson(String name) { Person person = new Person(); person.setName(name); personRepository.save(person); return person; } @Transactional public Person getPerson(String name) { Person person = personRepository.findPersonByName(name); return person; } @Transactional public List<Person> getAllPersons() { return toList(personRepository.findAll()); } @Transactional public Event createEvent(String name, Date date, Time startTime, Time endTime) { Event event = new Event(); event.setName(name); event.setDate(date); event.setStartTime(startTime); event.setEndTime(endTime); eventRepository.save(event); return event; } @Transactional public Event getEvent(String name) { Event event = eventRepository.findEventByName(name); return event; } @Transactional public List<Event> getAllEvents() { return toList(eventRepository.findAll()); } @Transactional public Registration register(Person person, Event event) { Registration registration = new Registration(); registration.setId(person.getName().hashCode() * event.getName().hashCode()); registration.setPerson(person); registration.setEvent(event); registrationRepository.save(registration); return registration; } @Transactional public List<Registration> getAllRegistrations(){ return toList(registrationRepository.findAll()); } @Transactional public List<Event> getEventsAttendedByPerson(Person person) { List<Event> eventsAttendedByPerson = new ArrayList<>(); for (Registration r : registrationRepository.findByPerson(person)) { eventsAttendedByPerson.add(r.getEvent()); } return eventsAttendedByPerson; } private <T> List<T> toList(Iterable<T> iterable){ List<T> resultList = new ArrayList<T>(); for (T t : iterable) { resultList.add(t); } return resultList; } }
2.7.2. Exposing Service Functionality via a RESTful API
Building a RESTful Web Service Using a Controller and Data Transfer Objects
-
We first create a new package
ca.mcgill.ecse321.eventregistration.controllerin EventRegistration-Backend and then createEventRegistrationRestControllerclass inside it. We add the annotation@RestControllerto the controller class so that HTTP requests can be dispacthed toEventRegistrationRestControllerclass. In addition, we enabled the Cross-Origin Resource Sharing for any domain using the@CrossOriginannotation on the REST controller class.package ca.mcgill.ecse321.eventregistration.controller; import org.springframework.web.bind.annotation.CrossOrigin; import org.springframework.web.bind.annotation.RestController; @CrossOrigin(origins = "*") @RestController public class EventRegistrationRestController { @Autowired private EventRegistrationService service; } -
We further create another package ca.mcgill.ecse321.eventregistration.dto and create the below Data Transfer Object (DTO) classes inside that package. First we create EventDto.java.
Data Access Object (DAO) != Data Transfer Object (DTO). These two are completely separate concepts, as you will also see below. These two should not be confused with each other. package ca.mcgill.ecse321.eventregistration.dto; import java.sql.Date; import java.sql.Time; public class EventDto { private String name; private Date eventDate; private Time startTime; private Time endTime; public EventDto() { } public EventDto(String name) { this(name, Date.valueOf("1971-01-01"), Time.valueOf("00:00:00"), Time.valueOf("23:59:59")); } public EventDto(String name, Date eventDate, Time startTime, Time endTime) { this.name = name; this.eventDate = eventDate; this.startTime = startTime; this.endTime = endTime; } public String getName() { return name; } public Date getEventDate() { return eventDate; } public Time getStartTime() { return startTime; } public Time getEndTime() { return endTime; } } -
Next, we create
PersonDtoJava class.package ca.mcgill.ecse321.eventregistration.dto; import java.util.Collections; import java.util.List; public class PersonDto { private String name; private List<EventDto> events; public PersonDto() { } @SuppressWarnings("unchecked") public PersonDto(String name) { this(name, Collections.EMPTY_LIST); } public PersonDto(String name, List<EventDto> arrayList) { this.name = name; this.events = arrayList; } public String getName() { return name; } public List<EventDto> getEvents() { return events; } public void setEvents(List<EventDto> events) { this.events = events; } } -
Finally, we create
RegistrationDtoJava class.package ca.mcgill.ecse321.eventregistration.dto; public class RegistrationDto { private PersonDto person; private EventDto event; public RegistrationDto() { } public RegistrationDto(PersonDto person, EventDto event) { this.person = person; this.event = event; } public PersonDto getperson() { return person; } public void setperson(PersonDto person) { this.person = person; } public EventDto getEvent() { return event; } public void setEvent(EventDto event) { this.event = event; } } -
We start adding the methods in the
EventRegistrationRestControllerclass. Also, we will add annotaions to map HTTP requests.In Spring Tools Suite (a.k.a. Eclipse), you can organize Java imports with kbd:[Ctrl+Shift+o] @GetMapping(value = { "/persons", "/persons/" }) public List<PersonDto> getAllPersons() { return service.getAllPersons().stream().map(p -> convertToDto(p)).collect(Collectors.toList()); } @PostMapping(value = { "/persons/{name}", "/persons/{name}/" }) public PersonDto createPerson(@PathVariable("name") String name) throws IllegalArgumentException { Person person = service.createPerson(name); return convertToDto(person); }The
@RequestMappingannotation is used to map HTTP requests to Spring Controller methods. Since,@RequestMappingmaps all HTTP operations by default. We can use@GetMapping,@PostMappingand so forth to narrow this mapping to specific HTTP operations.Moreover, in the above snippet, we use the
valueparameter of@PathVariableannotation to bind the value of the query string parameter name into the name parameter of thecreatePerson()method. -
You can add other methods similarly with appropriate mappings.
@PostMapping(value = { "/events/{name}", "/events/{name}/" })
public EventDto createEvent(@PathVariable("name") String name, @RequestParam Date date,
@RequestParam @DateTimeFormat(iso = DateTimeFormat.ISO.TIME, pattern = "HH:mm") LocalTime startTime,
@RequestParam @DateTimeFormat(iso = DateTimeFormat.ISO.TIME, pattern = "HH:mm") LocalTime endTime)
throws IllegalArgumentException {
	Event event = service.createEvent(name, date, Time.valueOf(startTime), Time.valueOf(endTime));
	return convertToDto(event);
}

@GetMapping(value = { "/events", "/events/" })
public List<EventDto> getAllEvents() {
	List<EventDto> eventDtos = new ArrayList<>();
	for (Event event : service.getAllEvents()) {
		eventDtos.add(convertToDto(event));
	}
	return eventDtos;
}

@PostMapping(value = { "/register", "/register/" })
public RegistrationDto registerPersonForEvent(@RequestParam(name = "person") PersonDto pDto,
	@RequestParam(name = "event") EventDto eDto) throws IllegalArgumentException {
	Person p = service.getPerson(pDto.getName());
	Event e = service.getEvent(eDto.getName());

	Registration r = service.register(p, e);
	return convertToDto(r, p, e);
}

@GetMapping(value = { "/registrations/person/{name}", "/registrations/person/{name}/" })
public List<EventDto> getEventsOfPerson(@PathVariable("name") PersonDto pDto) {
	Person p = convertToDomainObject(pDto);
	return createEventDtosForPerson(p);
}

@GetMapping(value = { "/events/{name}", "/events/{name}/" })
public EventDto getEventByName(@PathVariable("name") String name) throws IllegalArgumentException {
	return convertToDto(service.getEvent(name));
}

private EventDto convertToDto(Event e) {
	if (e == null) {
		throw new IllegalArgumentException("There is no such Event!");
	}
	EventDto eventDto = new EventDto(e.getName(),e.getDate(),e.getStartTime(),e.getEndTime());
	return eventDto;
}

private PersonDto convertToDto(Person p) {
	if (p == null) {
		throw new IllegalArgumentException("There is no such Person!");
	}
	PersonDto personDto = new PersonDto(p.getName());
	personDto.setEvents(createEventDtosForPerson(p));
	return personDto;
}

private RegistrationDto convertToDto(Registration r, Person p, Event e) {
	EventDto eDto = convertToDto(e);
	PersonDto pDto = convertToDto(p);
	return new RegistrationDto(pDto, eDto);
}

private Person convertToDomainObject(PersonDto pDto) {
	List<Person> allPersons = service.getAllPersons();
	for (Person person : allPersons) {
		if (person.getName().equals(pDto.getName())) {
			return person;
		}
	}
	return null;
}

private List<EventDto> createEventDtosForPerson(Person p) {
	List<Event> eventsForPerson = service.getEventsAttendedByPerson(p);
	List<EventDto> events = new ArrayList<>();
	for (Event event : eventsForPerson) {
		events.add(convertToDto(event));
	}
	return events;
}
Trying (Smoke Testing of) the Application
We can see if our application is able to respond to HTTP requests using, e.g., the Postman (Chrome), RESTClient browser plugin (Firefox), Advanced Rest Client (Firefox), or the command line tool called curl.
Once you launch the client, you can specify the path and select the method as shown in the below figures.
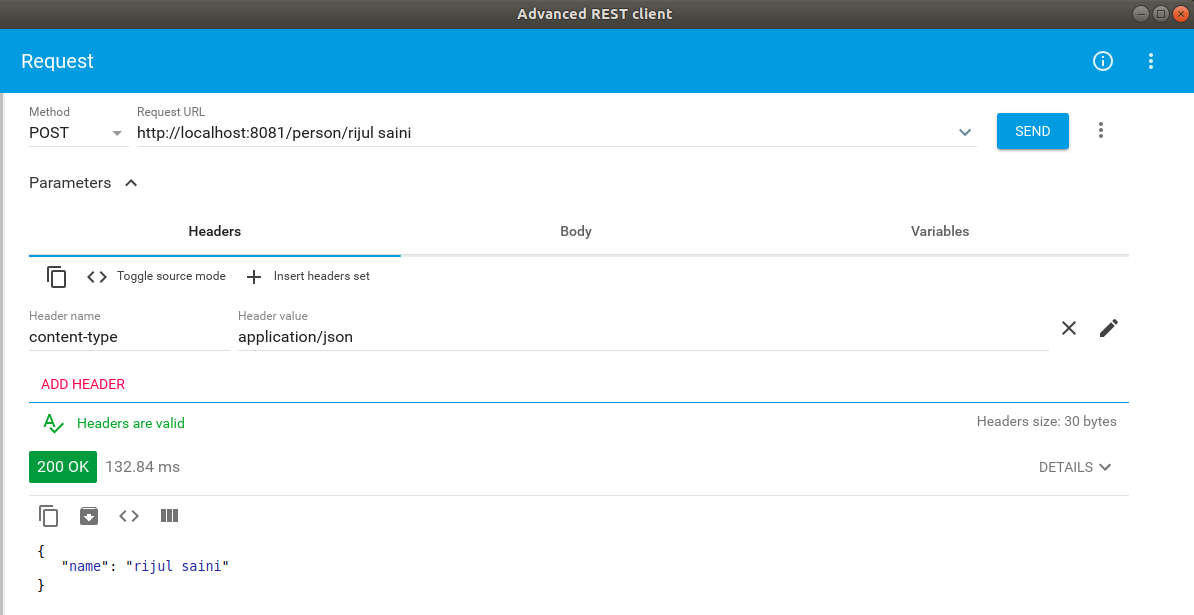
Once we use POST, the record is persisted and then we can use the GET method to retrive the same.

Similary, we can try other methods as well.
2.7.3. Spring Data - an Alternative Way to Expose Application Data via a RESTful Interface
The advantage of using Spring Data Rest is that it can remove a lot of boilerplate compared to the previous sections. Spring would automatically create endpoints for classes, such as /events and /person in the Event Registration example. In this case, implementing proper error handling may require some extra effort (not discussed here).
| This section presents an alternative way of exposing your data via a REST API. You do not have to use this method if you do not think that it fits your design. |
-
Add the dependency 'spring-boot-starter-data-rest' in build.gradle file of your backend. It is required to expose Spring Data repositories over REST using Spring Data REST. Update your
dependenciessection as shown below:dependencies { implementation 'org.springframework.boot:spring-boot-starter-data-jpa' implementation 'org.springframework.boot:spring-boot-starter-web' implementation 'org.springframework.boot:spring-boot-starter-data-rest' runtimeOnly 'org.postgresql:postgresql' testImplementation('org.springframework.boot:spring-boot-starter-test') { exclude group: 'org.junit.vintage', module: 'junit-vintage-engine' } } -
We have already added the dependency
spring-boot-starter-data-restexposes DAOs over RESTful endpoints using Spring Data REST. -
Next, we can go to repository interfaces and add a
@RepositoryRestResourceannotaion.// REST endpoint specification @RepositoryRestResource(collectionResourceRel = "person_data", path = "person_data") public interface PersonRepository extends CrudRepository<Person, String>{ Person findPersonByName(String name); } -
Finally, we can access this REST API (
http://localhost:8080/person_data) in the browser or REST Client and will receive the JSON as shown below.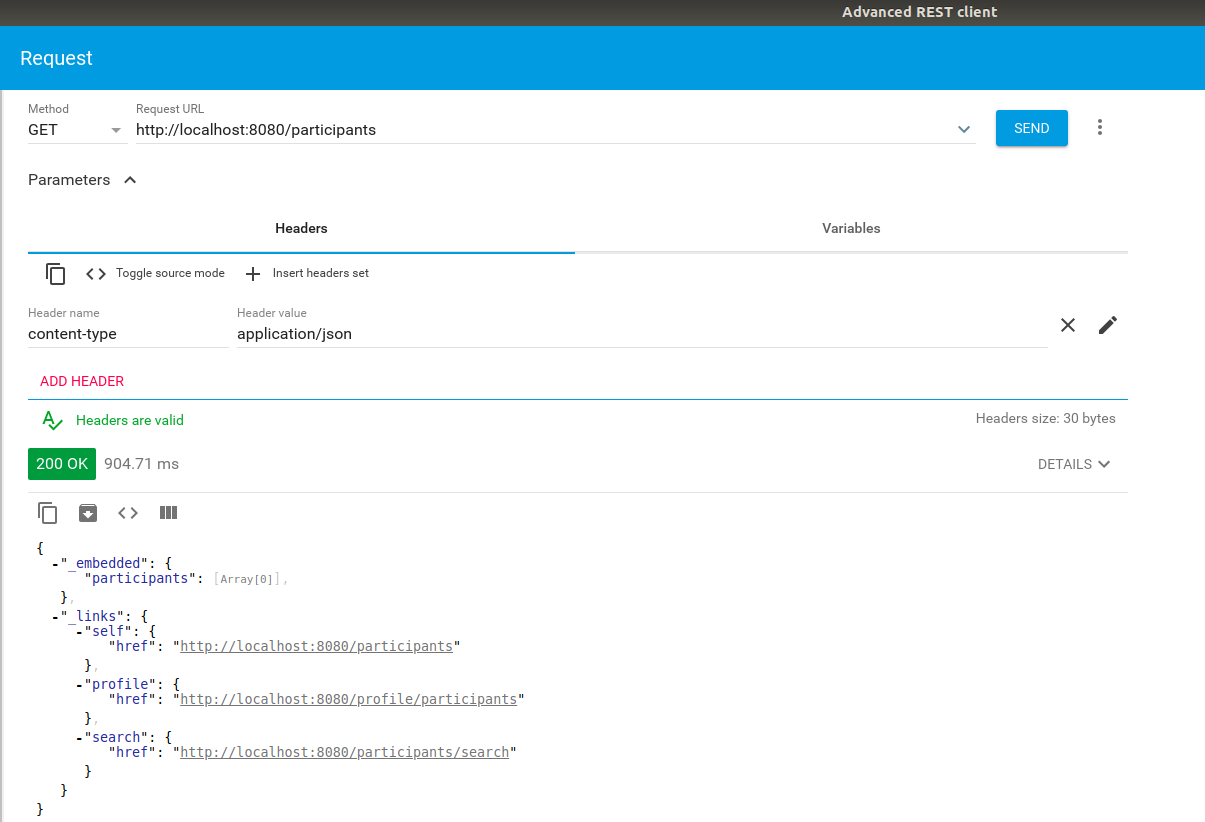
-
Exercise: turn on this Spring Data JPA feature for events and registrations, too.
-
Question: what information do we see in the response?
2.8. Testing Service Methods in Backend
2.8.1. Service Unit Testing Setup with Mockito
We need extra dependencies to support testing of the business methods in isolation.
-
Add the following dependencies to the project:
testImplementation 'org.mockito:mockito-core:2.+'
testImplementation 'org.mockito:mockito-junit-jupiter:2.18.3'

testRuntime 'org.junit.jupiter:junit-jupiter-engine:5.3.1'
Finding configuration settings for your Gradle/Maven projects is very simple by searaching for them on MVNRepository: https://mvnrepository.com/ -
If you also would like to run your project from Eclipse, add an additional dependency:
testImplementation 'org.junit.platform:junit-platform-launcher:1.4.1' -
Create a test class (in case you don’t already have one)
TestEventRegistrationServicein the corresponding package undersrc/test/java:package ca.mcgill.ecse321.eventregistration.service; import org.junit.jupiter.api.extension.ExtendWith; import org.mockito.junit.jupiter.MockitoExtension; @ExtendWith(MockitoExtension.class) public class TestEventRegistrationService { } -
Build your project to ensure its dependencies are correctly loaded.
2.8.2. Implementing Unit Tests for Service Class
-
Add the following static imports for methods:
import static org.junit.jupiter.api.Assertions.assertEquals; import static org.junit.jupiter.api.Assertions.assertNull; import static org.junit.jupiter.api.Assertions.fail; import static org.mockito.ArgumentMatchers.any; import static org.mockito.ArgumentMatchers.anyString; import static org.mockito.Mockito.lenient; import static org.mockito.Mockito.when; -
Add the following imports to the test class:
import java.sql.Date; import java.sql.Time; import java.time.LocalTime; import java.time.format.DateTimeFormatter; import java.util.Calendar; import org.junit.jupiter.api.BeforeEach; import org.junit.jupiter.api.Test; import org.junit.jupiter.api.extension.ExtendWith; import org.mockito.InjectMocks; import org.mockito.Mock; import org.mockito.invocation.InvocationOnMock; import org.mockito.junit.jupiter.MockitoExtension; import org.mockito.stubbing.Answer; import ca.mcgill.ecse321.eventregistration.dao.EventRepository; import ca.mcgill.ecse321.eventregistration.dao.PersonRepository; import ca.mcgill.ecse321.eventregistration.dao.RegistrationRepository; import ca.mcgill.ecse321.eventregistration.model.Event; import ca.mcgill.ecse321.eventregistration.model.Person; import ca.mcgill.ecse321.eventregistration.model.Registration; -
Create the DAO mock for person
@Mock
private PersonRepository personDao;

@InjectMocks
private EventRegistrationService service;

private static final String PERSON_KEY = "TestPerson";

@BeforeEach
public void setMockOutput() {
    lenient().when(personDao.findPersonByName(anyString())).thenAnswer( (InvocationOnMock invocation) -> {
        if(invocation.getArgument(0).equals(PERSON_KEY)) {
            Person person = new Person();
            person.setName(PERSON_KEY);
            return person;
        } else {
            return null;
        }
    });
}
lenient() tells Mockito not to warn us if we set up unnecessary mocks. You may prefer not to use lenient() to get those warnings. In that case, you will probably need to define the mock behaviour for each test separately. See https://github.com/McGill-ECSE321-Fall2022/EventRegistration-Monday/blob/main/EventRegistration-Backend/src/test/java/ca/mcgill/ecse321/eventregistration/service/PersonServiceTests.java for an example of unit tests without lenient().
|
-
Add test cases from the complete test suite that is available from here.
-
Run the tests as JUnit/Gradle tests and interpret the test error messages! You should see only a few (at least one) tests passing.
-
Update the implementation (i.e., replace the current service method codes with the ones provided below) of the following methods with input validation in the
EventRegistrationServiceservice class to make the tests pass (we are rapid simulating a TDD process — TDD stands for Test-Driven Development)@Transactional public Person createPerson(String name) { if (name == null || name.trim().length() == 0) { throw new IllegalArgumentException("Person name cannot be empty!"); } Person person = new Person(); person.setName(name); personRepository.save(person); return person; } @Transactional public Person getPerson(String name) { if (name == null || name.trim().length() == 0) { throw new IllegalArgumentException("Person name cannot be empty!"); } Person person = personRepository.findPersonByName(name); return person; } @Transactional public Event getEvent(String name) { if (name == null || name.trim().length() == 0) { throw new IllegalArgumentException("Event name cannot be empty!"); } Event event = eventRepository.findEventByName(name); return event; } @Transactional public Event createEvent(String name, Date date, Time startTime, Time endTime) { // Input validation String error = ""; if (name == null || name.trim().length() == 0) { error = error + "Event name cannot be empty! "; } if (date == null) { error = error + "Event date cannot be empty! "; } if (startTime == null) { error = error + "Event start time cannot be empty! "; } if (endTime == null) { error = error + "Event end time cannot be empty! "; } if (endTime != null && startTime != null && endTime.before(startTime)) { error = error + "Event end time cannot be before event start time!"; } error = error.trim(); if (error.length() > 0) { throw new IllegalArgumentException(error); } Event event = new Event(); event.setName(name); event.setDate(date); event.setStartTime(startTime); event.setEndTime(endTime); eventRepository.save(event); return event; } @Transactional public Registration register(Person person, Event event) { String error = ""; if (person == null) { error = error + "Person needs to be selected for registration! "; } else if (!personRepository.existsById(person.getName())) { error = error + "Person does not exist! "; } if (event == null) { error = error + "Event needs to be selected for registration!"; } else if (!eventRepository.existsById(event.getName())) { error = error + "Event does not exist!"; } if (registrationRepository.existsByPersonAndEvent(person, event)) { error = error + "Person is already registered to this event!"; } error = error.trim(); if (error.length() > 0) { throw new IllegalArgumentException(error); } Registration registration = new Registration(); registration.setId(person.getName().hashCode() * event.getName().hashCode()); registration.setPerson(person); registration.setEvent(event); registrationRepository.save(registration); return registration; } @Transactional public List<Event> getEventsAttendedByPerson(Person person) { if (person == null ) { throw new IllegalArgumentException("Person cannot be null!"); } List<Event> eventsAttendedByPerson = new ArrayList<>(); for (Registration r : registrationRepository.findByPerson(person)) { eventsAttendedByPerson.add(r.getEvent()); } return eventsAttendedByPerson; } -
Run the tests again, and all should be passing this time.
2.8.3. Service Integration Testing with the curl Tool
The command line utility curl is one way to automate integration testing for the REST API of your application. This brief section shows a basic examples for using it for testing with persons.
-
Make sure you have a clean database for your integration tests. This can be done by using the
spring.jpa.hibernate.ddl-auto=create-dropsetting in the application.properties file for the test backend, or by exposing a database clear API function that is only used durint integration testing. -
Start the backend server.
-
Issue
curl -s http://localhost:8080/personsand observe the output! -
Use the
-Xswitch to specify the used HTTP method:$ curl -s -X POST http://localhost:8080/persons/testperson1 {"name":"testperson1","events":[]} $ curl -s -X POST http://localhost:8080/persons/testperson2 {"name":"testperson2","events":[]} $ curl -s -X http://localhost:8080/persons [{"name":"testperson1","events":[]},{"name":"testperson2","events":[]}] -
To verify that a given content is in the returned values, you can use the standard output result of the command and filter it, for example, using
grep$ curl -s -X GET http://localhost:8080/persons | grep -o testperson1 testperson1 -
A way to get started with implementing a Gradle task for integration testing (expected in the second deliverable) is to call a command line tool (e.g.,
curl) from Gradle. Gradle documentation has a section on how to achieve this: https://docs.gradle.org/5.6.2/dsl/org.gradle.api.tasks.Exec.html#org.gradle.api.tasks.Exec
2.8.4. Service Integration Testing with Spring’s TestRestTemplate
As an alternative to the curl tool, you can test your application directly in your Spring project using the TestRestTemplate. This has a few benefits. For example, you can use built-in assertion methods to more precisely specify your test success conditions and you don’t need any extra steps to integrate these tests into your build system: running ./gradlew clean test will automatically run the integration tests. It’s also nice to be able to see the code coverage for your integration tests, even if it’s not required for your project.
-
Create a new integration testing class and annotate it with
@SpringBootTest(webEnvironment = WebEnvironment.RANDOM_PORT). This tells Spring to launch the app with a random port (to avoid conflicts if you are already running the app separately). -
Autowire a
TestRestTemplate. This will act as your API client (like the Advanced REST Client, Postman, orcurl). -
Autowire any repositories you need to clear the database before your tests.
-
You can send POST requests to your API using
TestRestTemplate.postForEntity(), send GET requests usingTestRestTemplate.getForEntity(), and so on. You’ll need to specify:-
A URL (which does not need to include the base URL, since the autowired
TestRestTemplatealready knows where your app is running) -
The type of object you expect to receive in response. You may find it helpful to create a new package-private DTO class to represent this response
-
For requests that include a body (e.g., POST), the body
-
A simple suite of integration tests for the Person-related endpoints might look like this:
import static org.junit.jupiter.api.Assertions.assertEquals;
import static org.junit.jupiter.api.Assertions.assertNotNull;
import static org.junit.jupiter.api.Assertions.assertTrue;

import org.junit.jupiter.api.AfterEach;
import org.junit.jupiter.api.BeforeEach;
import org.junit.jupiter.api.Test;
import org.springframework.beans.factory.annotation.Autowired;
import org.springframework.boot.test.context.SpringBootTest;
import org.springframework.boot.test.context.SpringBootTest.WebEnvironment;
import org.springframework.boot.test.web.client.TestRestTemplate;
import org.springframework.http.HttpStatus;
import org.springframework.http.ResponseEntity;

import ca.mcgill.ecse321.eventregistration.repository.PersonRepository;

@SpringBootTest(webEnvironment = WebEnvironment.RANDOM_PORT)
public class PersonIntegrationTests {

	@Autowired
	private TestRestTemplate client;

	@Autowired
	private PersonRepository personRepo;

	@BeforeEach
	@AfterEach
	public void clearDatabase() {
		personRepo.deleteAll();
	}

	@Test
	public void testCreateAndGetPerson() {
		int id = testCreatePerson();
		testGetPerson(id);
	}

	private int testCreatePerson() {
		ResponseEntity<PersonDto> response = client.postForEntity("/person", new PersonDto("Obi-Wan Kenobi"), PersonDto.class);

		assertNotNull(response);
		assertEquals(HttpStatus.CREATED, response.getStatusCode(), "Response has correct status");
		assertNotNull(response.getBody(), "Response has body");
		assertEquals("Obi-Wan Kenobi", response.getBody().getName(), "Response has correct name");
		assertTrue(response.getBody().getId() > 0, "Response has valid ID");

		return response.getBody().getId();
	}

	private void testGetPerson(int id) {
		ResponseEntity<PersonDto> response = client.getForEntity("/person/" + id, PersonDto.class);

		assertNotNull(response);
		assertEquals(HttpStatus.OK, response.getStatusCode(), "Response has correct status");
		assertNotNull(response.getBody(), "Response has body");
		assertEquals("Obi-Wan Kenobi", response.getBody().getName(), "Response has correct name");
		assertTrue(response.getBody().getId() == id, "Response has correct ID");
	}

	@Test
	public void testCreateInvalidPerson() {
		ResponseEntity<String> response = client.postForEntity("/person", new PersonDto("   "), String.class);

		assertNotNull(response);
		assertEquals(HttpStatus.BAD_REQUEST, response.getStatusCode(), "Response has correct status");
	}

	@Test
	public void testGetInvalidPerson() {
		ResponseEntity<String> response = client.getForEntity("/person/" + Integer.MAX_VALUE, String.class);

		assertNotNull(response);
		assertEquals(HttpStatus.NOT_FOUND, response.getStatusCode(), "Response has correct status");
		assertEquals("Person not found.", response.getBody(), "Response has correct error message");
	}
}

class PersonDto {
	private int id;
	private String name;

	// Need default constructor so that Jackson can instantiate the object
	public PersonDto() {}

	public PersonDto(String name) {
		this.name = name;
	}

	public int getId() {
		return this.id;
	}

	public String getName() {
		return this.name;
	}
}
2.9. Assessing Code Coverage using EclEmma
This tutorial covers the basics of EclEmma and retrieves code coverage metrics using it.
2.9.1. Getting EclEmma
Install EclEmma as a plugin in your Eclipse IDE from here.
| The Spring Tools Suite (STS) version of Eclipse already ships with the plugin pre-installed, so you can skip this step if you are using STS. |
2.9.2. Example Gradle Project for Assessing Code Coverage
We will create a Gradle project from scratch and be testing a simple method returnAverage(int[], int, int, int) .
-
Create a new Gradle project in Eclipse by clicking on File > New > Other
image::coverage-1.png[New Project] -
Under Gradle, choose Gradle Project
image::coverage-2.png[New Gradle Project] -
Click on Next, then name your project tutorial7, click on Finish
image::coverage-3.png[Project Name]The project may take some time to be created. -
Create a new package instead of the default ones for both the source and test folders (e.g
ca.mcgill.ecse321.tutorial7) and move the default generated classes (LibraryandLibraryTest) to this package.
image::coverage-4.png[Create Packages] -
Change the code in the
Libraryclasspackage ca.mcgill.ecse321.tutorial7; public class Library { public static double returnAverage(int value[], int arraySize, int MIN, int MAX) { int index, ti, tv, sum; double average; index = 0; ti = 0; tv = 0; sum = 0; while (ti < arraySize && value[index] != -999) { ti++; if (value[index] >= MIN && value[index] <= MAX) { tv++; sum += value[index]; } index++; } if (tv > 0) average = (double) sum / tv; else average = (double) -999; return average; } } -
Change the code in the
LibraryTestclasspackage ca.mcgill.ecse321.tutorial7; import static org.junit.Assert.assertEquals; import org.junit.Test; public class LibraryTest { @Test public void allBranchCoverageMinimumTestCaseForReturnAverageTest1() { int[] value = {5, 25, 15, -999}; int AS = 4; int min = 10; int max = 20; double average = Library.returnAverage(value, AS, min, max); assertEquals(15, average, 0.1); } @Test public void allBranchCoverageMinimumTestCaseForReturnAverageTest2() { int[] value = {}; int AS = 0; int min = 10; int max = 20; double average = Library.returnAverage(value, AS, min, max); assertEquals(-999.0, average, 0.1); } }
2.9.3. Retrieving Code Coverage Metrics
| We can straightforwardly manage code coverage using JaCoCo inside Eclipse with no configuration if we are using EclEmma Eclipse plugin. |
-
Run the Test in coverage mode using Eclemma. Click on LibraryTest, Coverage As, 1 JUnit Test
image::coverage-5.png[Full Branch Coverage] -
Verify that we have 100% branch coverage.
image::coverage-6.png[Full Branch Coverage-Eclemma]
2.10. Event Registration Application Unit Code Coverage
-
Check the code coverage of the service unit tests in the EventRegistration-Backend project.
-
If you want to run the tests using gradle, use the Jacoco plugin with plugin ID
jacoco. After adding it to the build.gradle file, the plugin section should look like the one below:
plugins {
	id 'org.springframework.boot' version '2.2.4.RELEASE'
	id 'io.spring.dependency-management' version '1.0.9.RELEASE'
	id 'java'
	id 'jacoco'
}-
This new plugin gives us the
jacocoTestReporttask that can generate html reports. Try executing this task from the terminal and see the generated HTML files under build/reports/jacoco/test/html/! -
If you wish, you can check enforce a certain treshold on the test cases with this Jacoco plugin. With the definition below, the
./gradlew jacocoTestCoverageVerificationtask will fail if code coverage is below 60%.
jacocoTestCoverageVerification {
	violationRules {
		rule {
			limit {
				minimum = 0.6
			}
		}
	}
}
3. Frontend
3.1. Installation Instructions: Vue.js
Vue.js is a popular web frontend for building user interfacs in Javascript, which is considered to be easier to learn compared to React and Angular.
3.1.1. Install Vue.js
-
Open a shell (or run cmd.exe in Windows)
-
Check that you successfully installed node.js and npm e.g. by checking their versions:
$ node -v v10.21.0 (or higher) $ npm -v 6.14.4 (or higher) -
Install the command line interface (CLI) for Vue:
npm install -g @vue/cli -
Install the init add-on for vue-cli:
npm install -g @vue/cli-init
3.1.2. Generate initial Vue.js project content
-
Navigate to your local Git repository of the Event Registration System
$ cd ~/git/eventregistration
-
Generate initial content as follows
-
Hit Enter after each line if not indicated otherwise
-
Detailed instructions at https://github.com/vuejs-templates/webpack and https://bootstrap-vue.js.org/docs
$ vue init bootstrap-vue/webpack eventregistration-frontend
? Project name (EventRegistration-Frontend) eventregistration-frontend
? Project description (A Vue.js project) A Vue.js frontend for Event Registration App
? Author (Your Name <your.email@provider.com>)
? Vue build (Use arrow keys):
> Runtime + Compiler
  Runtime-only
? Install vue-router (Y/n): Y
? Use ESLint to lint your code (Y/n): n
? Setup unit tests with Karma + Mocha (Y/n) Y
? Setup e2e tests with Nightwatch (Y/n) Y

vue-cli · Generated "eventregistration-frontend".
-
-
Rename the generated directory to match the naming convention applied for the backend project
mv eventregistration-frontend/ EventRegistration-Frontend -
Now execute the following commands (one after the other)
$ cd EventRegistration-Frontend $ npm install $ npm run dev -
As a result A sample web page should appear at http://localhost:8080/
-
You can stop this development server by pressing Ctrl+C in the shell
3.1.3. Install additional dependencies
-
Install JQuery and Axios (we will use these dependencies for issuing REST API calls):
npm install --save jquery
npm install --save axios
3.1.4. Setting up your development server
-
We change the default port to 8087 (instead of the default 8080) and the default IP address by using a configuration file. The rationale behind this step is that other Tomcat servers may already listen at the default localhost:8080 port which may clash with our development server.
-
Open ./config/index.js and add
port: 8087tomodule.exports(bothbuildanddevpart)-
The development server is set up at localhost, i.e. http://127.0.0.1:8087
-
The production server is set up in accordance with the virtual machines
-
We also store the host IP address and port of the backend server in similar environment variables (
backendHostandbackendPort).module.exports = { build: { env: require('./prod.env'), host: '127.0.0.1', port: 8087, backendHost: '127.0.0.1', backendPort: 8080, //... }, dev: { env: require('./dev.env'), host: '127.0.0.1', port: 8087, backendHost: '127.0.0.1', backendPort: 8080, //... } }
-
-
Open ./build/dev-server.js, and change the
uriassignment as follows:-
The original line of code can be commented or deleted.
//var uri = 'http://localhost:' + port
var host = config.dev.host
var uri = 'http://' + host + ':' + port
-
-
Start again your development server by
npm run dev. The same web application should now appear at http://127.0.0.1:8087/ -
Stop the development server by pressing Ctrl+C.
3.2. Create a Static Vue.js Component
Vue.js promotes the use of components which encapsulate GUI elements and their behavior in order to build up rich user interfaces in a modular way. A component consists of
-
template: A template of (a part of) an HTML document enriched with data bindings, conditional expressions, loops, etc.
-
script: The behavior of the user interface programmed in JavaScript.
-
style: The customized graphical appearance of HTML document elements.
We will first create a new Vue.js component and then connect it to a backend Java Spring service via a Rest API call.
3.2.1. Create a component file
We use . below to refer to the EventRegistration-Frontend directory.
|
-
Create a new file EventRegistration.vue in ./src/components with the following initial content:
<template> </template> <script> </script> <style> </style> -
Create some static HTML content of the template part starting with a
<div>element corresponding to your component. We<template> <div id="eventregistration"> <h2>People</h2> <table> <tr> <td>John</td> <td>Event to attend</td> </tr> <tr> <td> <input type="text" placeholder="Person Name"> </td> <td> <button>Create</button> </td> </tr> </table> <p> <span style="color:red">Error: Message text comes here</span> </p> </div> </template> -
Customize the
<style>part with your designated CSS content. A detailed CSS reference documentation is available at https://www.w3schools.com/CSSref/. The final result of that part should like as follows.<style> #eventregistration { font-family: 'Avenir', Helvetica, Arial, sans-serif; color: #2c3e50; background: #f2ece8; } </style>
3.2.2. Create a new routing command
-
We need to route certain HTTP calls to a specific URL to be handled by EventRegistration.vue.
-
Open ./src/router/index.js and add a new route by extending the existing
routesproperty.export default new Router({ routes: [ { path: '/', name: 'Hello', component: Hello }, { path: '/app', name: 'EventRegistration', component: EventRegistration } ] })-
You should not change the number of spaces used as indentation otherwise you get error messages, if you have LInt enabled in your project.
-
Import the new component
EventRegistration.vueat the beginning of ./src/router/index.js after all existing imports!// add import after all existing imports import EventRegistration from '@/components/EventRegistration'
-
-
Start the development server and navigate your browser to http://127.0.0.1:8087/#/app. Your new Vue.js component should be rendered (with the static HTML content).
3.3. Vue.js Components with Dynamic Content
3.3.1. Add data and event handlers
Next we add event handling and dynamic content to our EventRegistration.vue component.
-
Create another file registration.js in the same folder which will contain the Javascript code for the EventRegistration.vue component.
-
Create constructor methods:
function PersonDto (name) { this.name = name this.events = [] } function EventDto (name, date, start, end) { this.name = name this.eventDate = date this.startTime = start this.endTime = end } -
Add data variables to the export declaration of the component.
export default { name: 'eventregistration', data () { return { persons: [], newPerson: '', errorPerson: '', response: [] } }, //... } -
Add an initialization function below the data part.
created: function () { // Test data const p1 = new PersonDto('John') const p2 = new PersonDto('Jill') // Sample initial content this.persons = [p1, p2] }, -
Add event handling method createPerson():
methods: {
    createPerson: function (personName) {
      // Create a new person and add it to the list of people
      var p = new PersonDto(personName)
      this.persons.push(p)
      // Reset the name field for new people
      this.newPerson = ''
    }
  }
3.3.2. Create dynamic data bindings
-
Open
EventRegistration.vueand link the Javascript file as script:<script src="./registration.js"> </script> -
Change the static template content for the person list to dynamic bindings:
-
We iterate along all people in data property
peopleand dynamically print their name by{{ person.name }}(see list rendering) -
We print the (currently empty) list of events to which a person is registered to.
<template>
  <div id="eventregistration">
    <h2>Persons</h2>
      <table>
        <tr v-for="person in persons" :key="person.name">
            <td>{{ person.name }}</td>
            <td>
              <ul>
                <li v-for="event in person.events" :key="event.name">
                  {{event.name}}
                </li>
              </ul>
            </td>
        </tr>
    <!-- ... -->
    </table>
  </div>
</template>
-
-
Link input field content with data variable
newPersonand button clicks for Create Person for event handler methodcreatePerson().<table> <!-- ... --> <tr> <td> <input type="text" v-model="newPerson" placeholder="Person Name"> </td> <td> <button v-bind:disabled="!newPerson" @click="createPerson(newPerson)">Create Person</button> </td> </tr> </table> -
Bind the error message to the corresponding variable
errorPersonby extending the<span>tag with conditional rendering.-
The error message will only appear if the data property
errorPersonis not empty. -
You may wish to further refine error handling in case of empty string content for
newPersonby adding&& !newPersonto the condition.<span v-if="errorPerson" style="color:red">Error: {{errorPerson}} </span>
-
-
Run your frontend application and observe that two people are listed.
3.4. Calling Backend Services
Next we change our frontend to issue calls to the backend via the Rest API provided by the Java Spring framework. Please refer to the section 3.6.2 where we enabled the Cross-Origin Resource Sharing at the controller level using '@CrossOrigin' notation.
3.4.1. Calling backend services in from Vue.js components
We need to modify our frontend to make calls to backend services.
-
Open registration.js and add the following content to the beginning:
-
Note that instead of hard-wired IP addresses and ports, details are given in a configuration file.
import axios from 'axios'
var config = require('../../config')

var frontendUrl = 'http://' + config.dev.host + ':' + config.dev.port
var backendUrl = 'http://' + config.dev.backendHost + ':' + config.dev.backendPort

var AXIOS = axios.create({
  baseURL: backendUrl,
  headers: { 'Access-Control-Allow-Origin': frontendUrl }
})
-
-
Now navigate to the created function, and replace existing content with the following lines:
created: function () { // Initializing persons from backend AXIOS.get('/persons') .then(response => { // JSON responses are automatically parsed. this.persons = response.data }) .catch(e => { this.errorPerson = e }) // Initializing events AXIOS.get('/events') .then(response => { this.events = response.data }) .catch(e => { this.errorEvent = e // this.errors.push(e) }) } -
Navigate to the createPerson() method and change its content as follows:
createPerson: function (personName) { AXIOS.post('/persons/'.concat(personName), {}, {}) .then(response => { // JSON responses are automatically parsed. this.persons.push(response.data) this.errorPerson = '' this.newPerson = '' }) .catch(e => { var errorMsg = e.response.data.message console.log(errorMsg) this.errorPerson = errorMsg }) } -
Run the frontend application and check that
-
New people can be added
-
They immediately appear in the people list.
-
3.5. Additional steps in the tutorial
3.5.1. Managing events
-
List all events (name, eventDate, startTime, endTime)
-
Introduce an array events in the frontend data store
Update your registration.js:
data() { return { persons: [], events: [], // ... other data members } }, -
Call the appropriate backend service to fill the contents
Update your registration.js:
created: function () { // Initializing persons // See: was done above // Initializing events AXIOS.get('/events').then(response => {this.events = response.data}).catch(e => {this.errorEvent = e}); }, -
Provide a dynamic list in the component and bind it to events
Update your EventRegistration.vue:
    <span v-if="errorPerson" style="color:red">Error: {{errorPerson}}</span>
    <!-- This line above is the last line of the section we added in the previous section -- this is only here to ease the navigation in the code -->

<hr>
  <h2>Events</h2>
  <table>
    <tr>
      <th>Event Name</th>
      <th>Date</th>
      <th>Start</th>
      <th>End</th>
      <!--<th>Edit</th>-->
    </tr>
    <tr v-for="event in events">
      <td>{{ event.name }}</td>
      <td>{{ event.eventDate }}</td>
      <td>{{ event.startTime }}</td>
      <td>{{ event.endTime }}</td>
      <!--<td>
        <button v-on:click="updateEvent(event.name)">Edit</button>
      </td>-->
    </tr>
  </table>
      <span v-if="errorEvent" style="color:red">Error: {{errorEvent}} </span>
<hr>
-
-
Create a new event (name, date, startTime, endTime)
-
Introduce an object newEvent in the frontend data store with four properties (e.g. name, date, startTime, endTime).
-
Set the initial values of these properties to somet value
Update registration.js and add to
data()at the topnewEvent: { name: '', eventDate: '2017-12-08', startTime: '09:00', endTime: '11:00' }, errorEvent: '',
-
-
Provide a button to initiate creating a new event and provide HTML input fields to set event details
-
Create a call to the appropriate backend service, i.e. createEvent()
Update EventRegistration.vue
<!-- Add this to the bottom of the table created for displaying events --> <tr> <td> <input type="text" v-model="newEvent.name" placeholder="Event Name"> </td> <td> <input type="date" v-model="newEvent.eventDate" placeholder="YYYY-MM-DD"> </td> <td> <input type="time" v-model="newEvent.startTime" placeholder="HH:mm"> </td> <td> <input type="time" v-model="newEvent.endTime" placeholder="HH:mm"> </td> <td> <button v-bind:disabled="!newEvent.name" v-on:click="createEvent(newEvent.name, newEvent.eventDate, newEvent.startTime, newEvent.endTime)">Create</button> </td> </tr> -
Introduce an object errorEvent for error message related to event creation
This one has been done for registration.js already (
errorEventindata()) -
Provide corresponding HTML field for displaying the error message (e.g.
<span>), and set its appearance condition to the content of the error messageUpdate EventRegistration.vue: add the following code to the event table
<span v-if="errorEvent" style="color:red">Error: {{errorEvent}} </span>
-
-
Register a person to an event (when a new event should occur in the list of events printed next to a person)
-
Provide a selection of people
-
You need a corresponding data variable (e.g. selectedPerson)
-
You can use the HTML
<select v-model="selectedPerson">tag where each option (<option>tag withv-forVue.js parameter) is filled dynamically from the list of people. -
Hint: You can add a first disabled option as follows:
<option disabled value="">Please select one</option>
-
-
Provide a selection of events in a similar way.
-
Provide a button to initiate registration
-
Enable the button only if both a person and an event are selected
The solution for the above bullet points (goes to EventRegistration.vue):
<hr> <h2>Registrations</h2> <label>Person: <select v-model="selectedPerson"> <option disabled value="">Please select one</option> <option v-for="person in persons" > {{ person.name }} </option> </select> </label> <label>Event: <select v-model="selectedEvent"> <option disabled value="">Please select one</option> <option v-for="event in events" > {{ event.name }} </option> </select> </label> <button v-bind:disabled="!selectedPerson || !selectedEvent" @click="registerEvent(selectedPerson,selectedEvent)">Register</button> <hr> -
Implement the register method in registration.js:
registerEvent: function (personName, eventName) { var indexEv = this.events.map(x => x.name).indexOf(eventName) var indexPart = this.persons.map(x => x.name).indexOf(personName) var person = this.persons[indexPart] var event = this.events[indexEv] AXIOS.post('/register', {}, {params: { person: person.name, event: event.name}}) .then(response => { // Update appropriate DTO collections person.events.push(event) this.selectedPerson = '' this.selectedEvent = '' this.errorRegistration = '' }) .catch(e => { var errorMsg = e console.log(errorMsg) this.errorRegistration = errorMsg }) },-
To run your applicaiton, use
npm installandnpm run dev -
See https://github.com/Rijul5/eventregistration3 for the completed solution
-
-
3.5.2. Further documentation
-
Vue.js guide: https://vuejs.org/v2/guide/
-
Vue.js API: https://vuejs.org/v2/api/
-
Build commands: http://vuejs-templates.github.io/webpack/commands.html
-
Vue.js and Webpack integration: http://vuejs-templates.github.io/webpack/env.html
-
Html-Webpack: https://github.com/jantimon/html-webpack-plugin
-
Vue Router: https://github.com/vuejs/vue-router
-
Vue Router tutorial: https://scotch.io/tutorials/getting-started-with-vue-router